26/10/2019: So I had a good few hours at the garage this morning and the wheels came off really easily. The shocks followed pretty quickly too. This left me with enough time to start to investigate the slight uneven brake wear.
I was suspecting that maybe the guide pin was seized or not moving freely. To check I took of the brake calliper. It’s only two bolts to remove and a bit of wiggling. I was a little surprised to see how badly rusted and how dirty the calliper was.

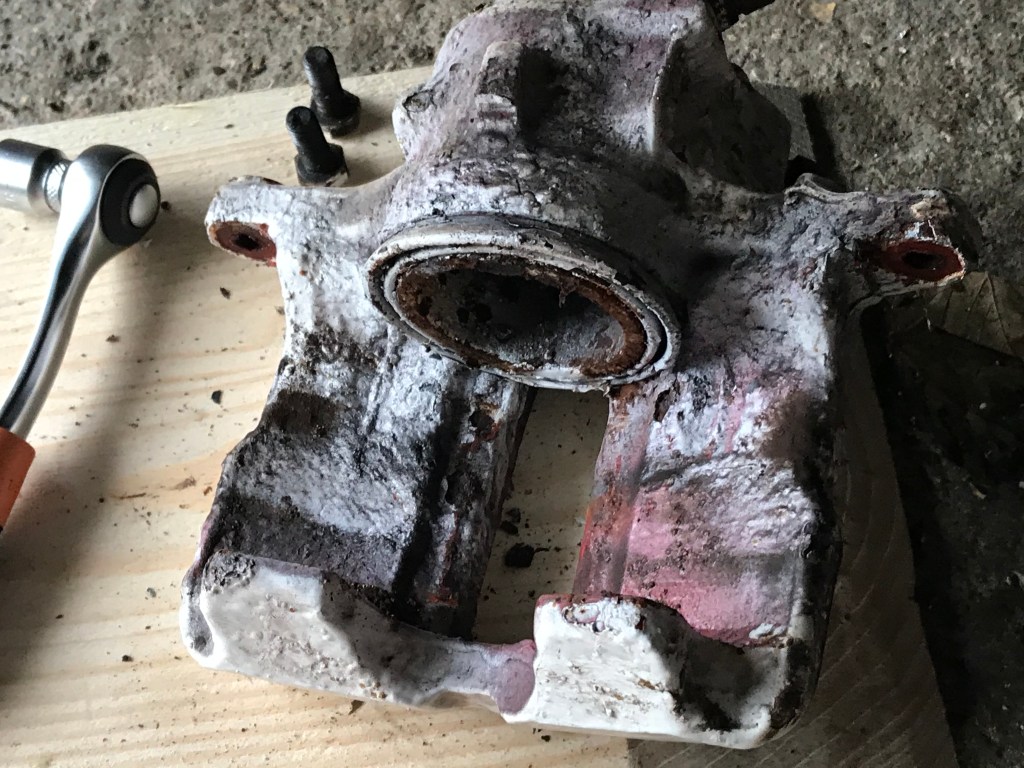
To be honest they are a mess! Whilst the guide pins were moving reasonable freely the rubber boots covering the top was perished away. I didn’t touch the seal around the piston for fear they were as delicate. I suspect the other side is just as bad.
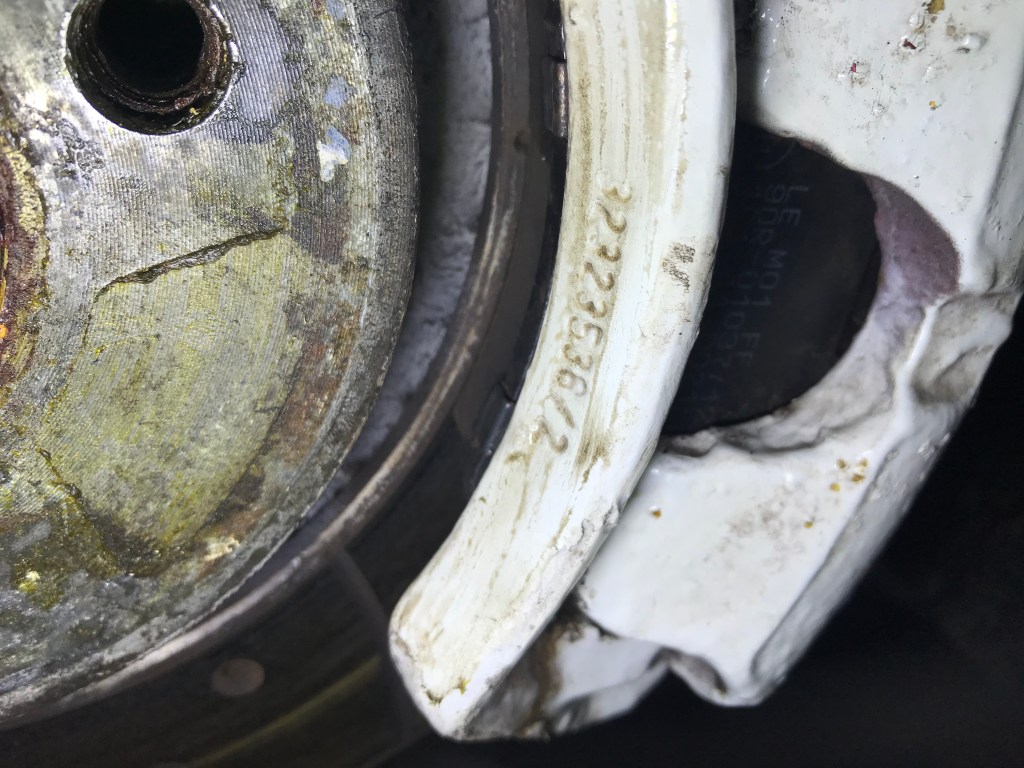
I need to identify what calliper this is. I did find a part number but can’t seem to track it down on the net. I’m sure that someone on the forum will know.
I also grabbed a shot of the back of the brake pads (which are just normal road pads). I think I’ll upgrade them to something a bit racier.

For now, I’ve put everything back together whilst I think what to do. Tiger over an uprated brake kit which I think is a real possibility in the future. It might be stretching my budget a little at the moment. I’m exploring options for sandblasting and powder coating these callipers. This is likely to be around £100.00 I reckon all in. Maybe a little less.
If I can identify the brake model then I can get a service kit and replace all the rubbers and the pins. I think it needs it! I’ll be focussing on sorting out the suspension first and then I’ll get to this.
30/10/2019: The first quote is back in… £100. Not a bad guess! I’ve got a couple more coming in and then I’ll make a choice about what to do.
The brakes seem to be a set from a VW Golf Mk 2. I’m not exactly sure what variant of the Mk2 they are off or if that even matters. I’ve found a couple of repair kits but they don’t come with a replacement piston. Such as this Frentech:

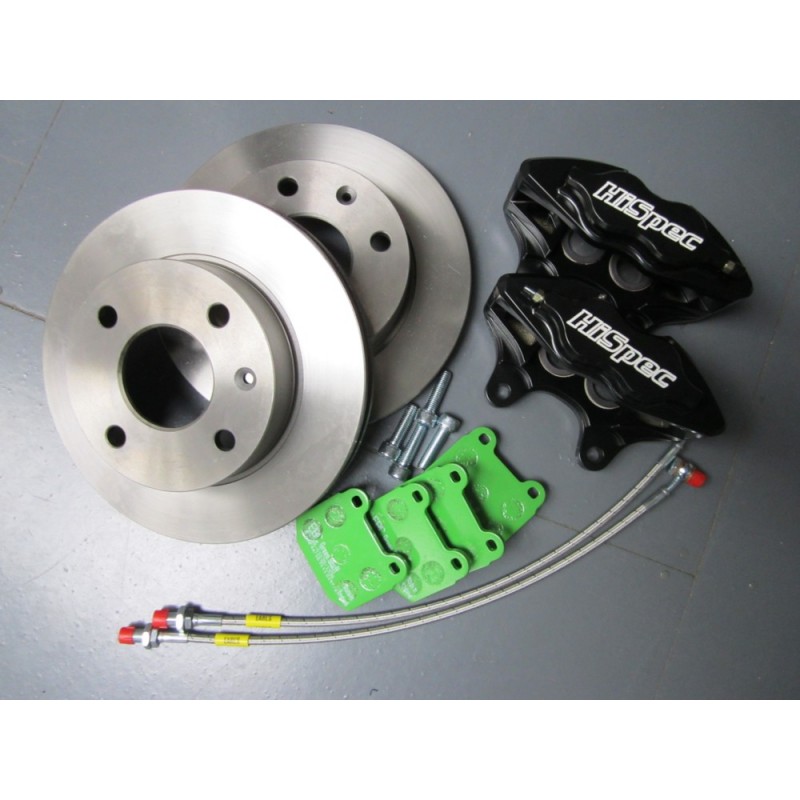
I’m not totally convinced this is the right set yet so I need to do a little more digging. The price is starting to creep up too. With around £100 for the blasting and painting, £20 ish for the repair kit and probably another £20 or £30 for the pistons that’s heading towards £150. Throw in another £35 for some green stuff brake pads (not sure I can find some yellows to fit) and I’m almost at £200. That’s a lot to spend if I’m going to do the High-Spec Tiger upgrade later:
Hmm… quite a bit to think about. I guess I’ll sort the suspension out (as that actually needs repairing) and then have a think about this… Christmas present perhaps!
23/11/2019: I should have perhaps updated this page a little sooner. It was my birthday a few days ago and I was treated to the Hi-Spec upgrade kit! The kit arrived three days ago, well packed and sporting instructions:
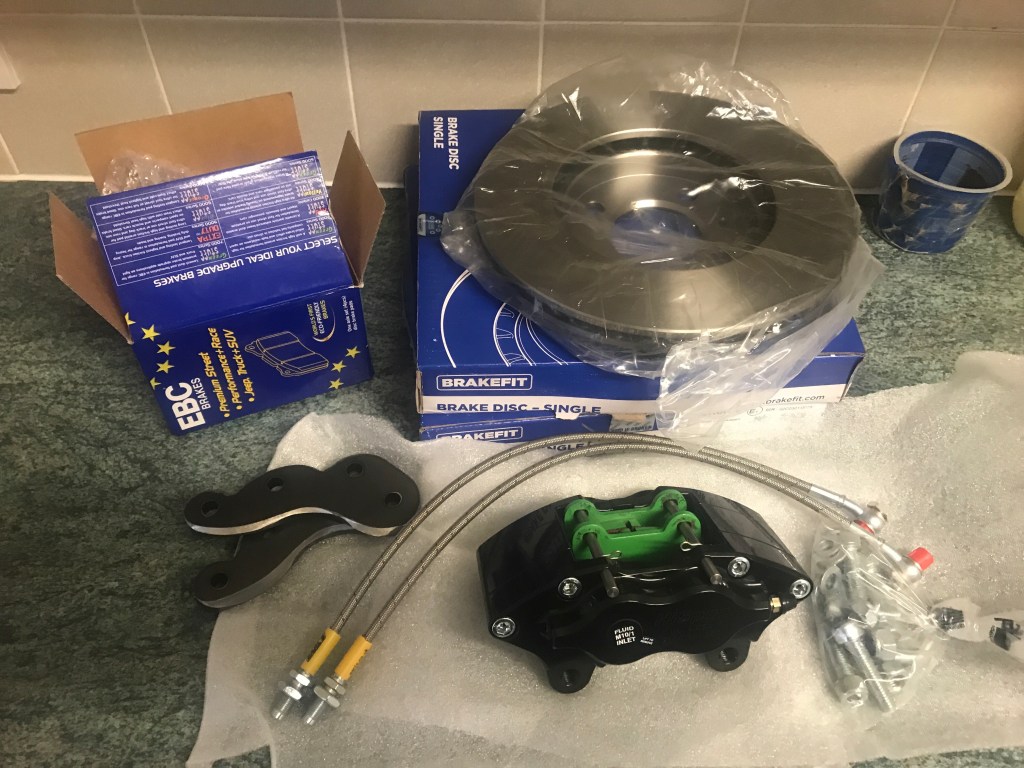
I’ve learned a few extra things about brakes since getting the kit. Most of my ‘know how’, what little I have (!), comes from watching YouTube clips. Most mechanics on YouTube are working on normal road cars. I’m not sure if the Tiger would be classed as an exotic (it’s not a Ferrari!) but I’m sure that it is engineered for performance more than a typical road car. This new brake kit certainly is!
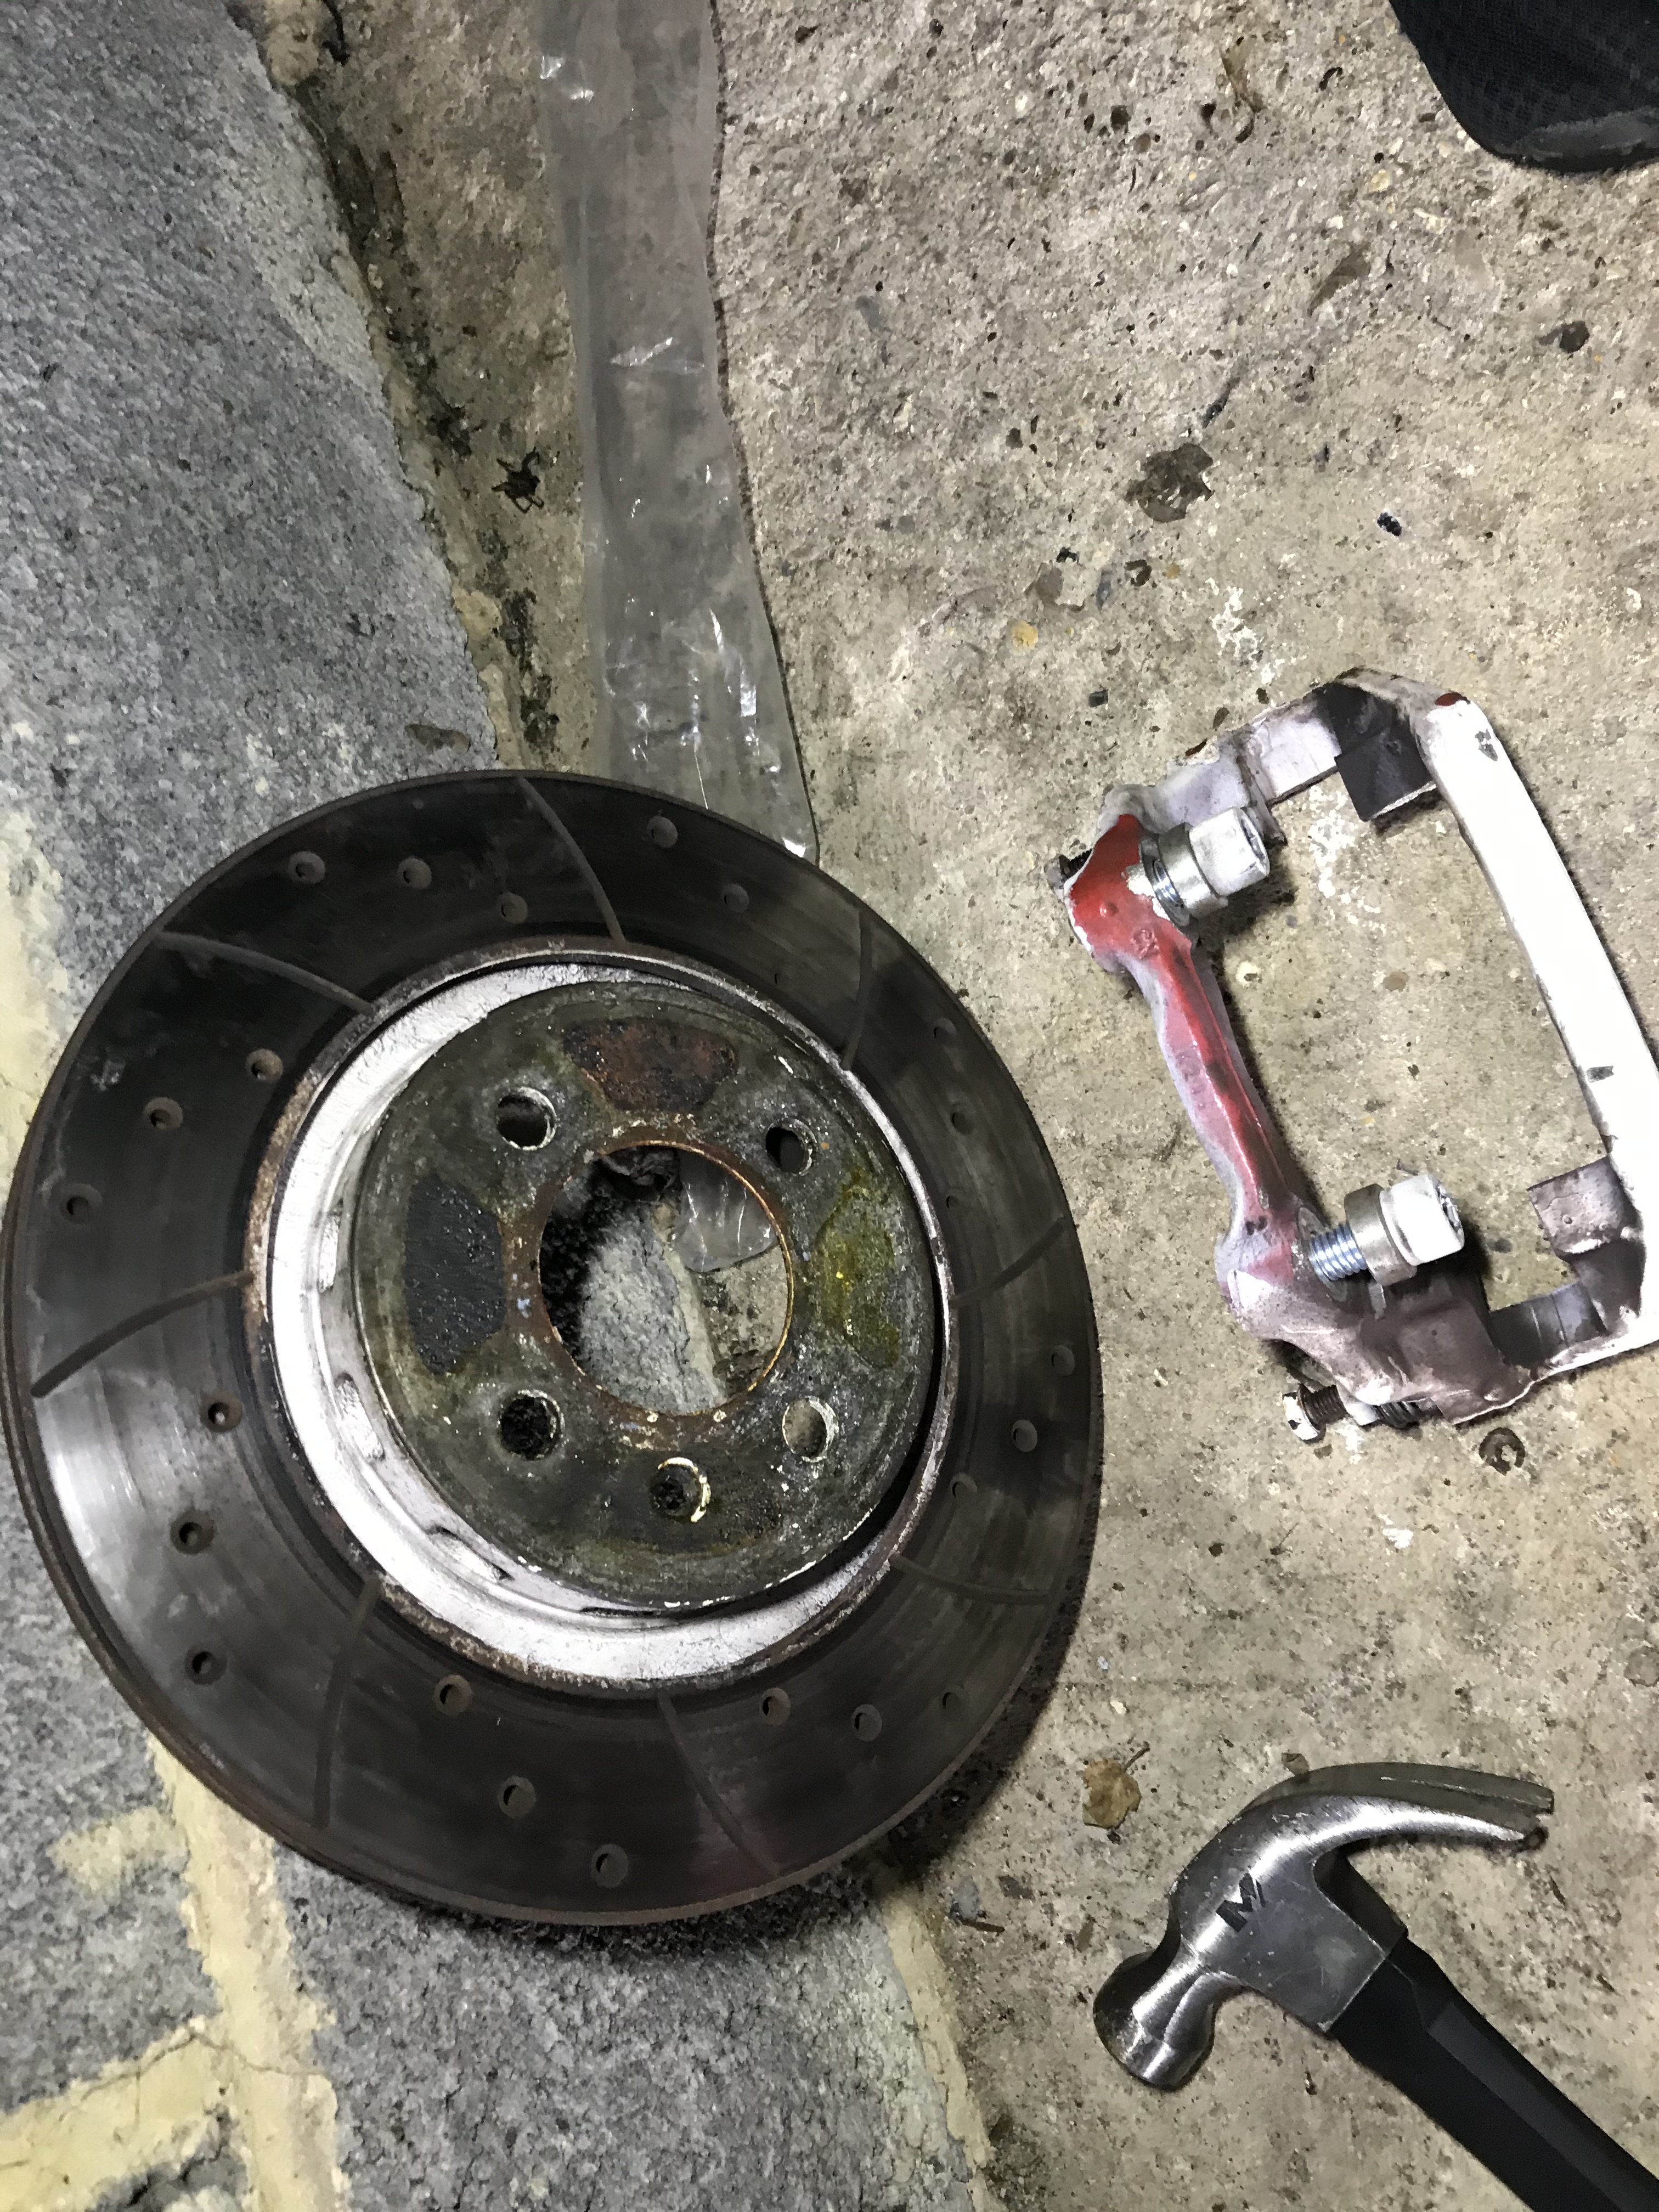
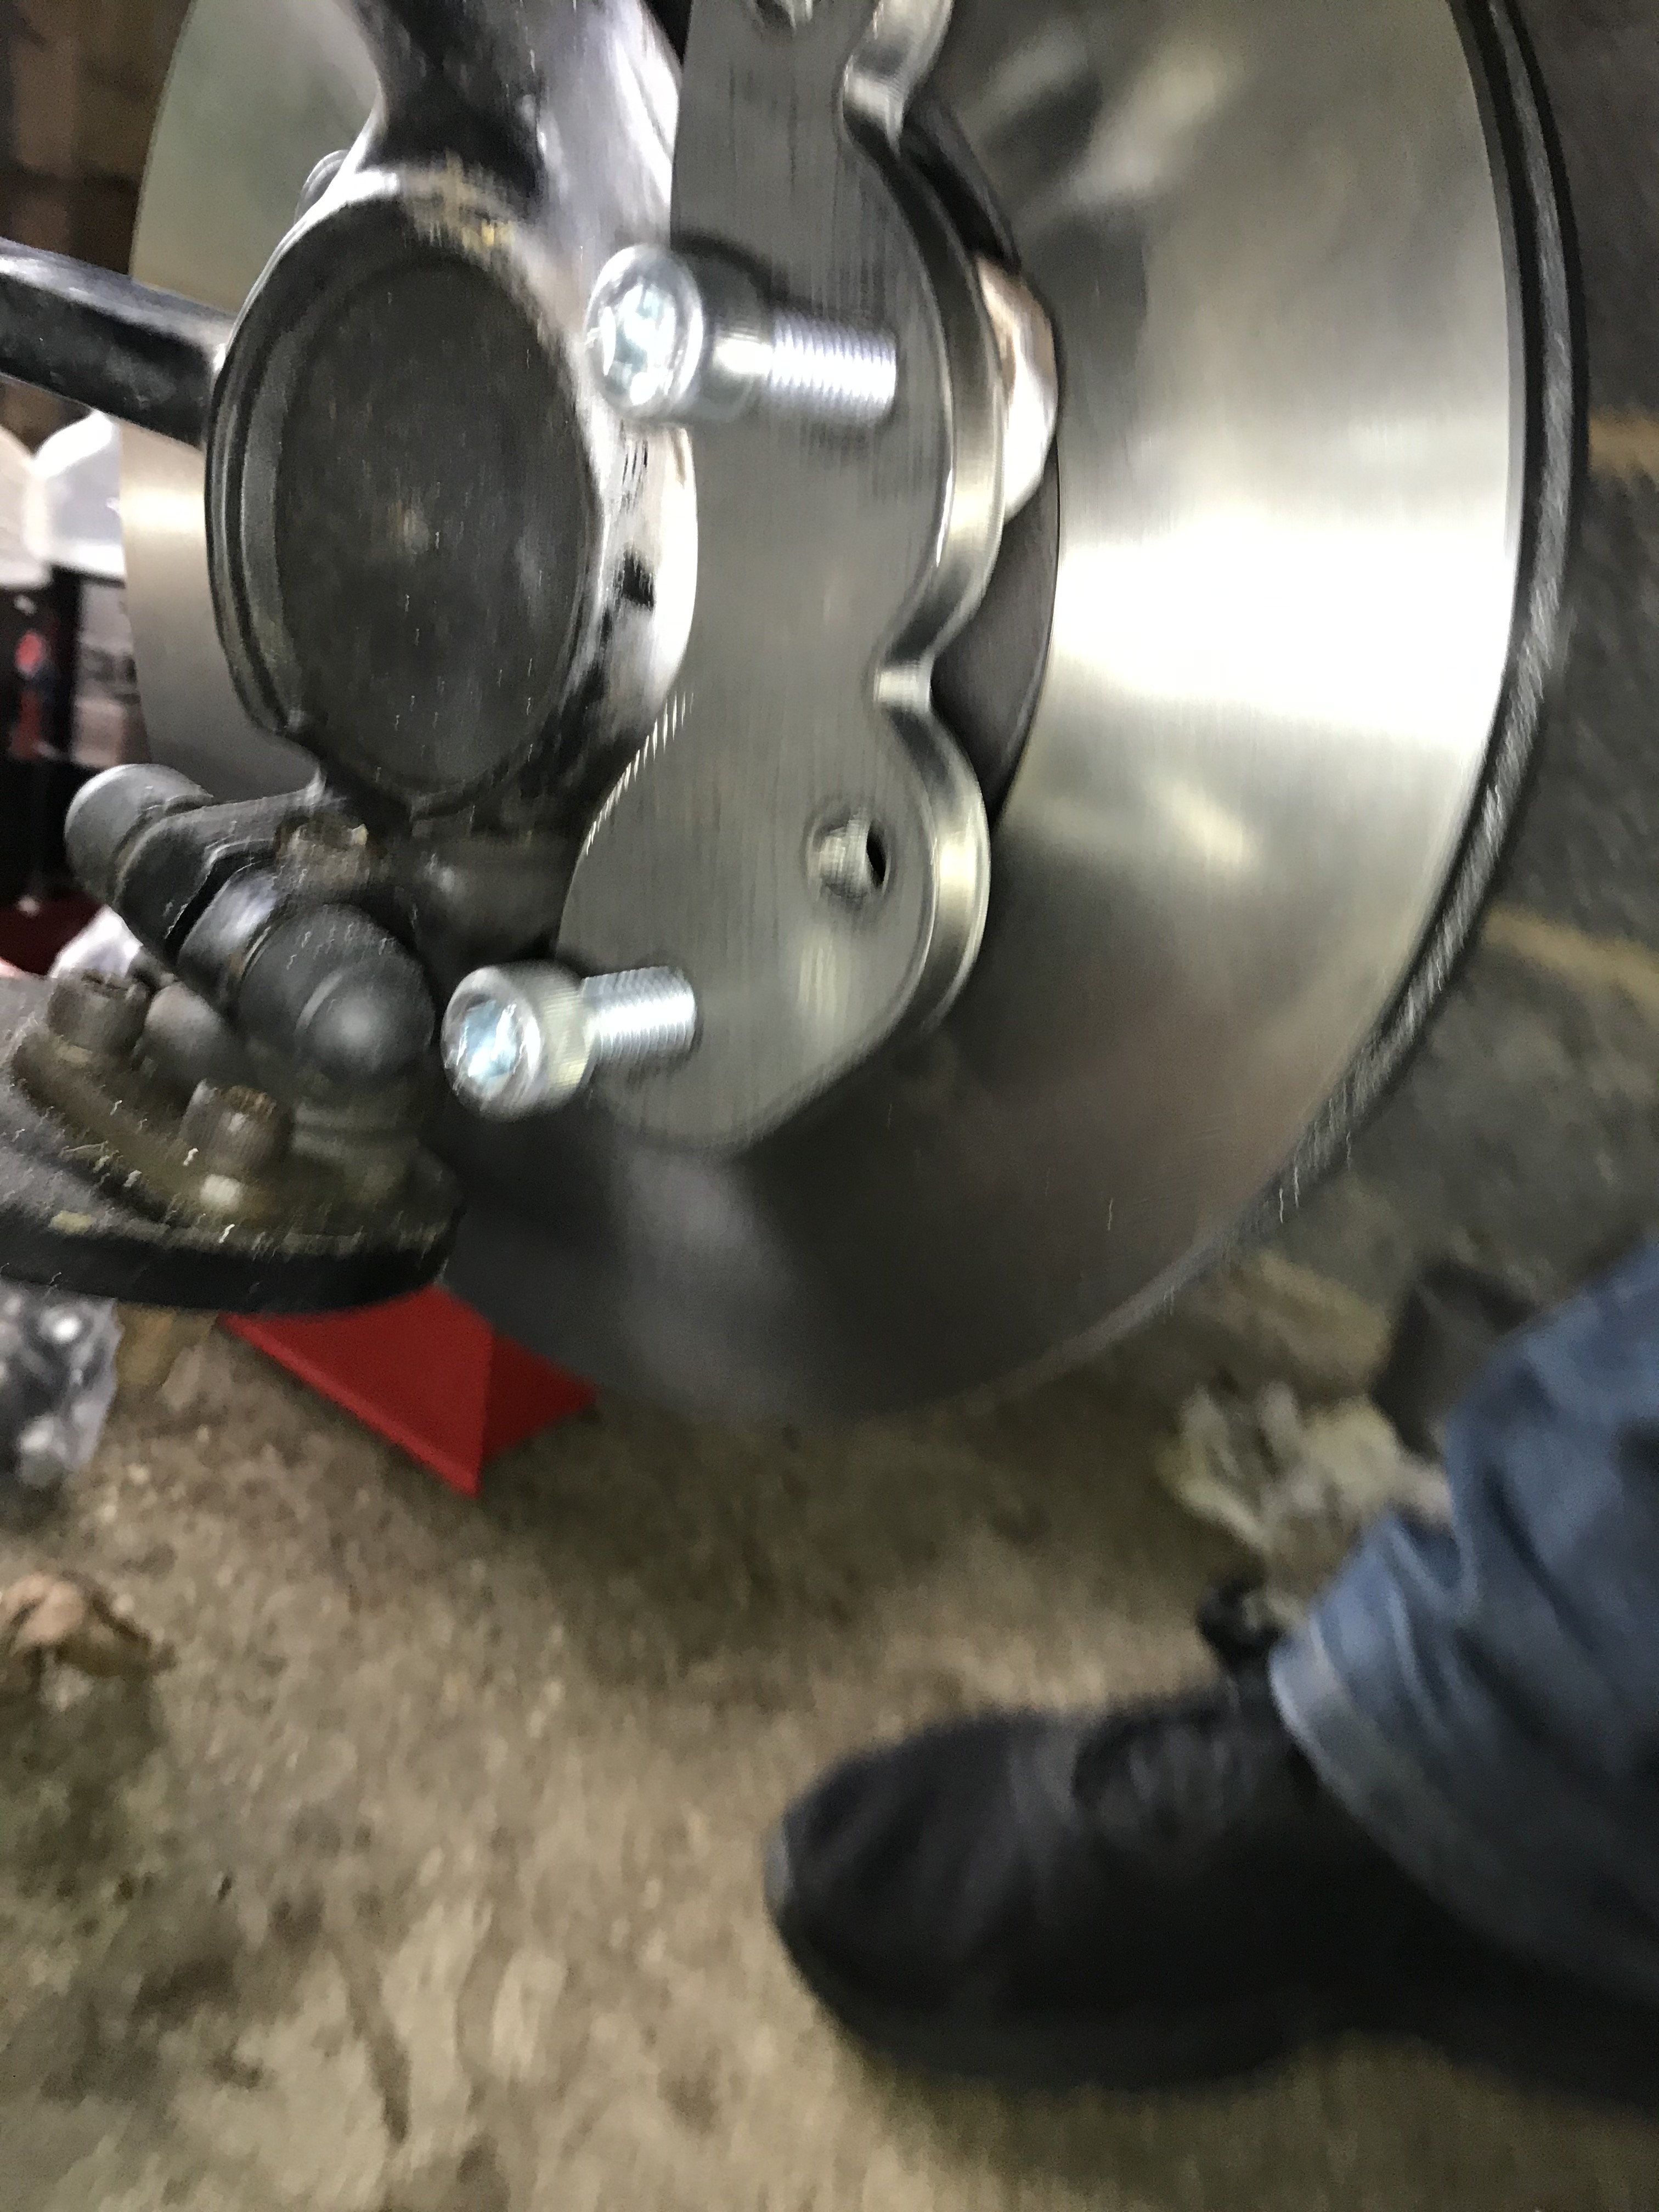
In all of the videos I’d watched on brake repairs and replacement, the callipers had pistons only on one side and were ‘floating’. This means they use a calliper guide pin to allow the calliper to move. The fact that the calliper can move allows it to self centre as the piston (or pistons) squeeze from one side. You can see this on the slightly sorry calliper I’m replacing:

This has one large piston. The new HiSpec calliper has four smaller pistons, two on each side. As it squeezes from both sides the calliper is fixed centrally over the brake disc and the pneumatic pressure ensures that the brake pads on each side squeeze equally. More expensive to manufacturer, slightly harder to install but, apparently, higher performance.
The job today was to strip the old brake system off and to test fit the new. I planned to leave the old calliper attached to the brake lines for now and to connect the brake lines next weekend. I was a little concerned about the process as reading the instructions didn’t leave me much clearer as to what to do. I’m sure this is 80% me and 20% the instructions! I do think Tiger might want to think about using some clearer (perhaps colour) pictures in their instructions. I couldn’t really make out the grainy images very well. The instructions also referred to ‘removing some metal’. That would be fine except I don’t have an angle grinder!
The morning started with the, now familiar routine, of getting the front of the car jacked and the wheels off.


This revealed the system to be removed:

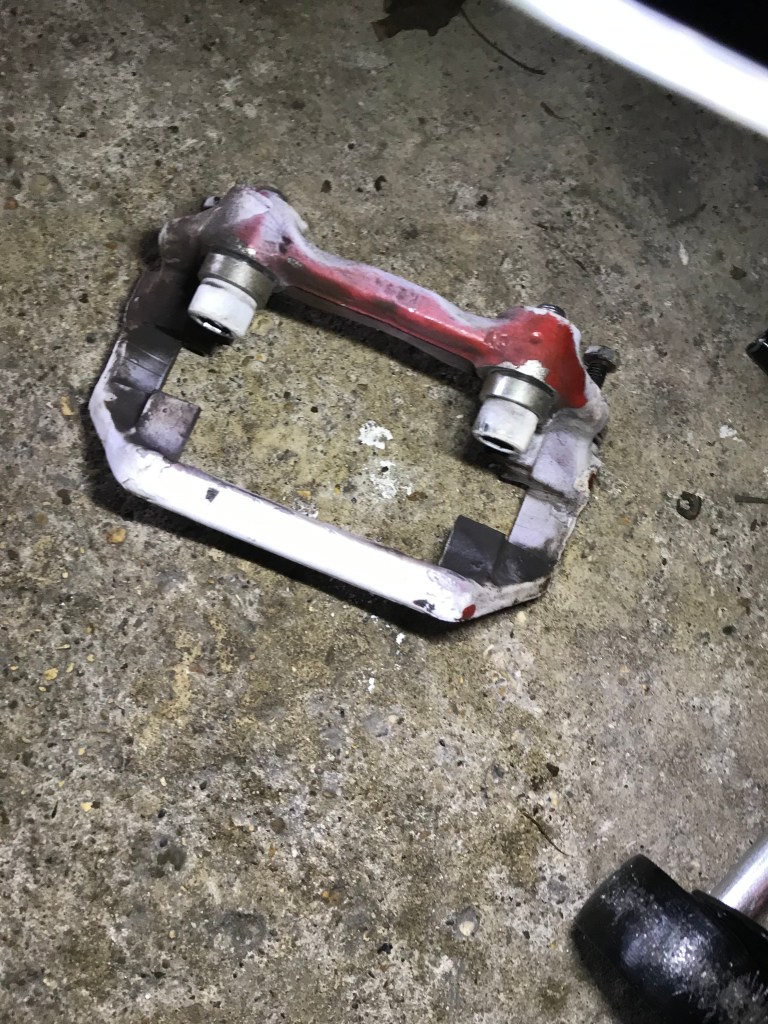
The first job was to remove the calliper. This is simple enough. There are two (13mm I think) bolts on the back of the calliper bracket. These bolt into the guide pins I mentioned above. The guide pins can be identified in the picture below as they have the rubber boot on they (which has been painted… not good!).


There’s one bolt at the top and one at the bottom. One these are removed the calliper can be persuaded to leave the bracket. As the Tiger is quite low I could just sit the old calliper on the floor without putting any strain on the brake line. This left me with just the brake calliper bracket attached:

In order to access the two 10mm hex headed bolts which hold the calliper bracket onto the plate which sits behind the wheel hub (I think that is what it is called!) I had to free the swivel column/pin (I think this is what it is called). Not too big a job but I didn’t realise that the top most bolt and it’s washer (which are elliptical) set the camber for the wheel. I didn’t marks it’s position so when I put it all back together I’ll had to match the other side and hope it’s correct!
At this point I was still thinking that the mounting plate in the Tiger pack was going to fix to the calliper bracket. The job became more simple when I realised all of the old system is coming off. I had to nip to Halford to pick up a socket set with hex heads in. Thankfully each size had two different lengths because even with the bolt from the swivel column/pin out of the way, the column itself was still making access difficult.
I’m pretty sure all the bolts had thread lock on as I had to use the breaker bar to get them moving. It wasn’t such a big deal once I had the extra socket set. Once I’d got the two 10mm hex bolt off and removed the calliper:
This left the plate attached on the disc side of the wheel hub by two 6mm hex bolts. I’m sure they have a specific name as they where really wide at the top but I don’t know it:

You can see the old calliper sat on the floor with easily enough slack on the brake line.
The plate soon succumbed to the persuasion of the breaker bar and all of the old system was off:

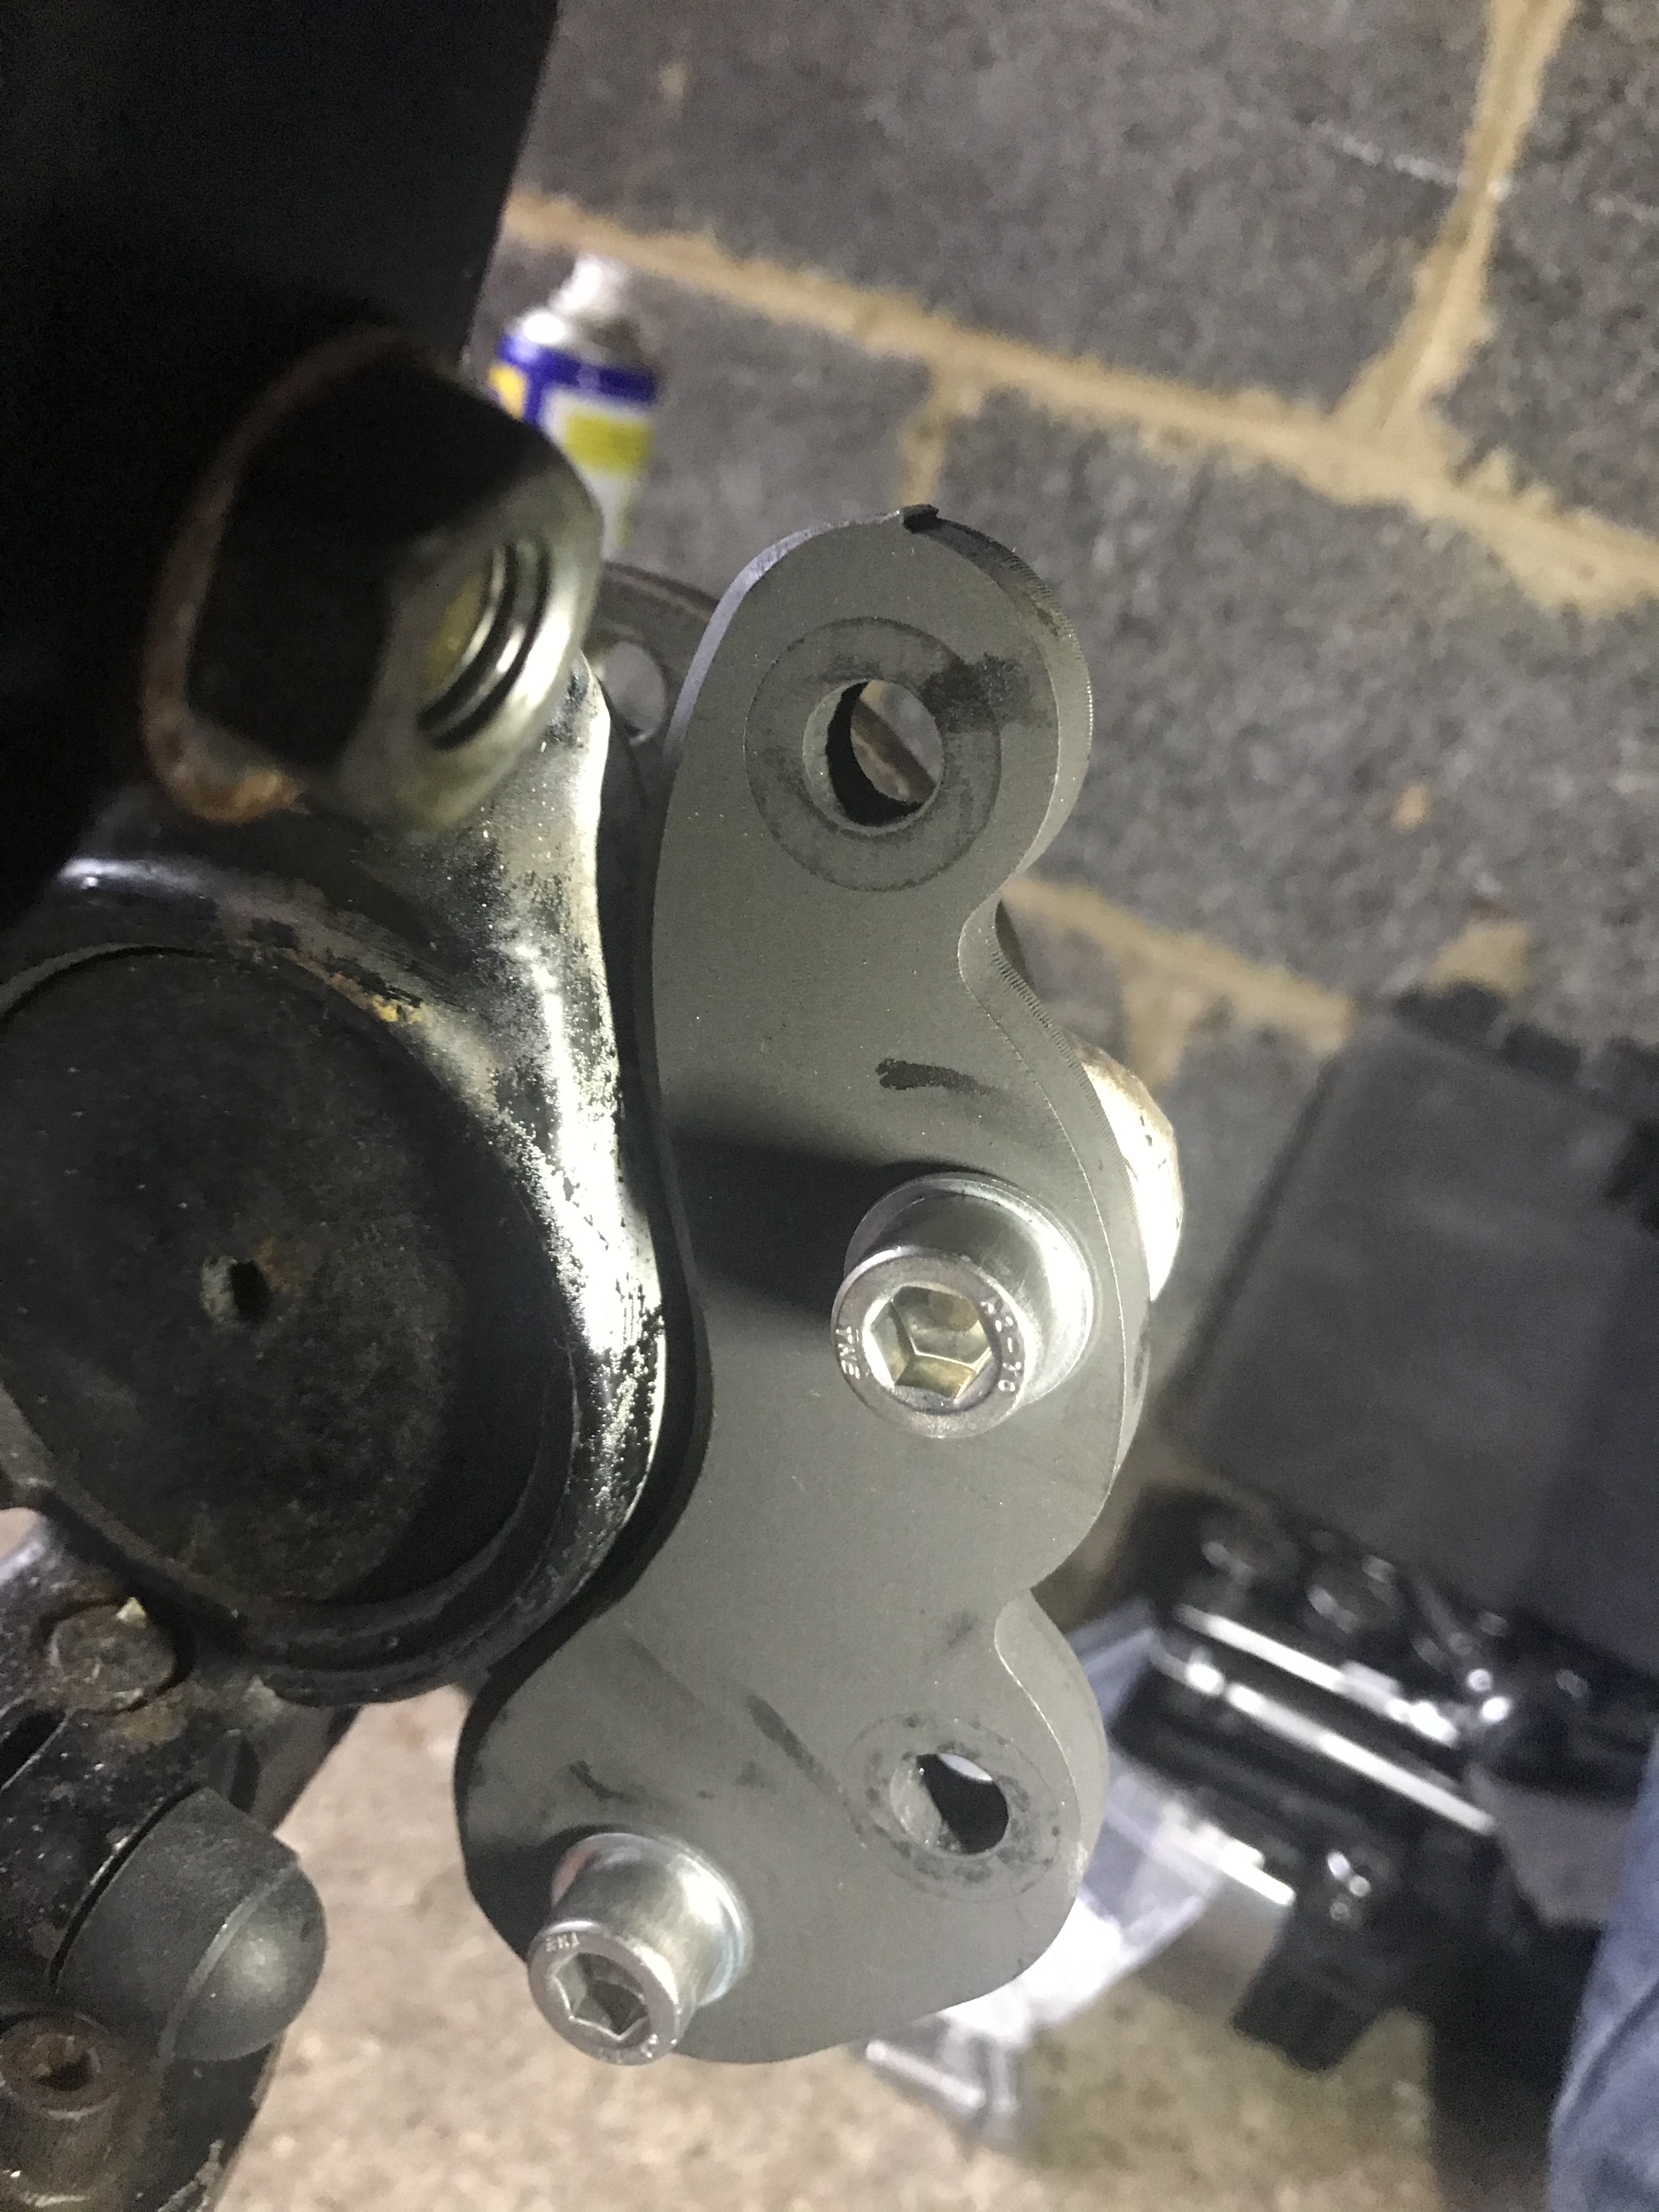
Mounting the new gear was really quite straightforward one I realised it mounted to the wheel hub and not the calliper bracket (I did think that I’d ordered a kit that didn’t fit for about 30 minutes… I’m slow!).
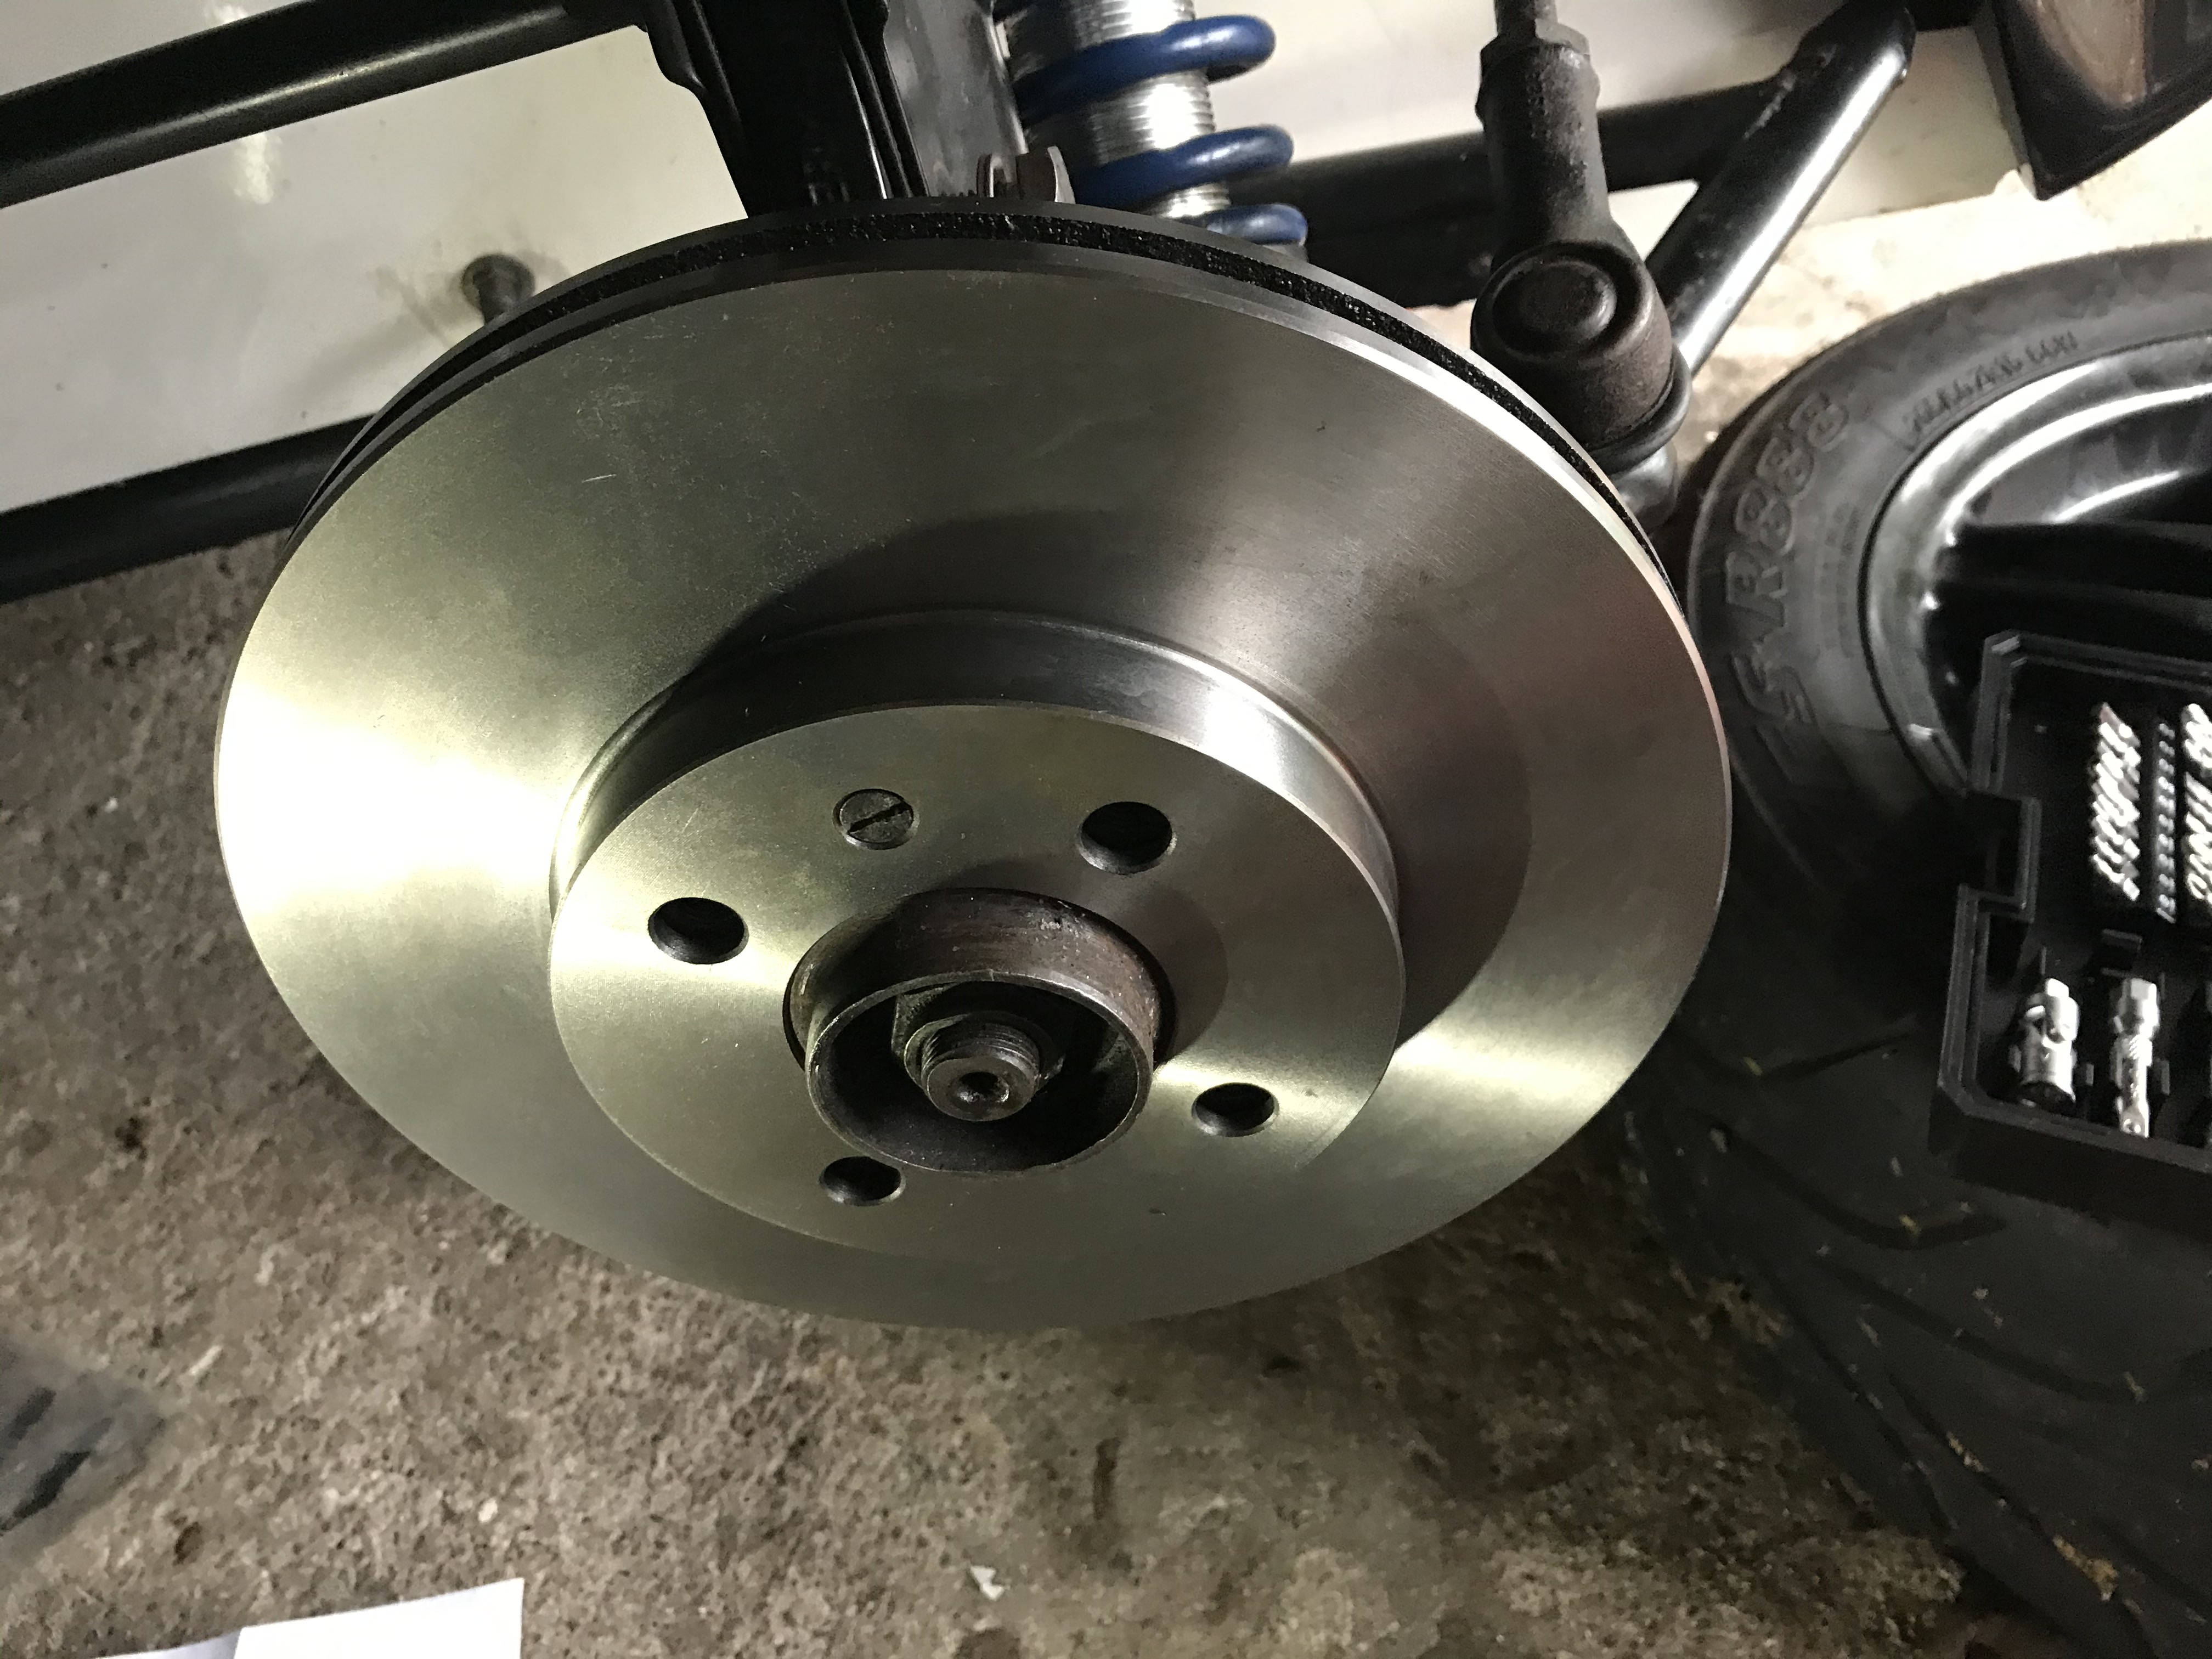

The only drama was when I realised that I’d mocked up the passenger side calliper on the drivers side meaning the bleed value was at the bottom of the calliper. Nothing is tightened up yet but here is an idea of how it looks:

I’m really pleased. As a bonus I realised at the end that two of the brake pads had already been modified and I don’t need to buy an angle grinder (yet!).
I’ve stripped the callipers back off now as I’m going to paint the mounting plates with a high heat matt black paint. I’m also waiting for some high heat silicone-based grease to arrive.
Finally, I needed to establish what type of break fluid is in the car. It might be DOT 3, 4, 5 or 5.1. I’m also not sure when the last time the fluid was changed was so it’s due a flush. However, DOT 3, 4 and 5.1 brakes fluids cannot be mixed with DOT 5. DOT 3, 4 and 5.1 are miscible (i.e. dissolve) in water and DOT 5 doesn’t. I syringed up a little of the fluid and squirted into some water (at the second attempt… embarrassingly I missed on the first!).
You can see the test here and how the brake fluid clearly dissolves (it would stay as a ball if it was DOT 5), so I have DOT 3, 4 or 5.1:
I’m going to flush the system with DOT 4 at the same time as bleeding the brakes (hopefully next weekend). I might get a chance to do the painting of the mounting plates before then. If I do, I’ll post up some pictures.
15/01/2020: Re-reading the previous post it’s so clear pride comes before a fall! What I didn’t realise when I was doing my test fitting is that as soon as I tightened the hardware up the bolts fouled on something. The kit from Tiger came with 4 x 30mm and 4 x 25mm M8 bolts and 4 Nyloc nuts. To cut a very long story short I really needed 8 x 20mm bolts, no nuts and thread lock! My lack of experience made me assume that I was doing something wrong!
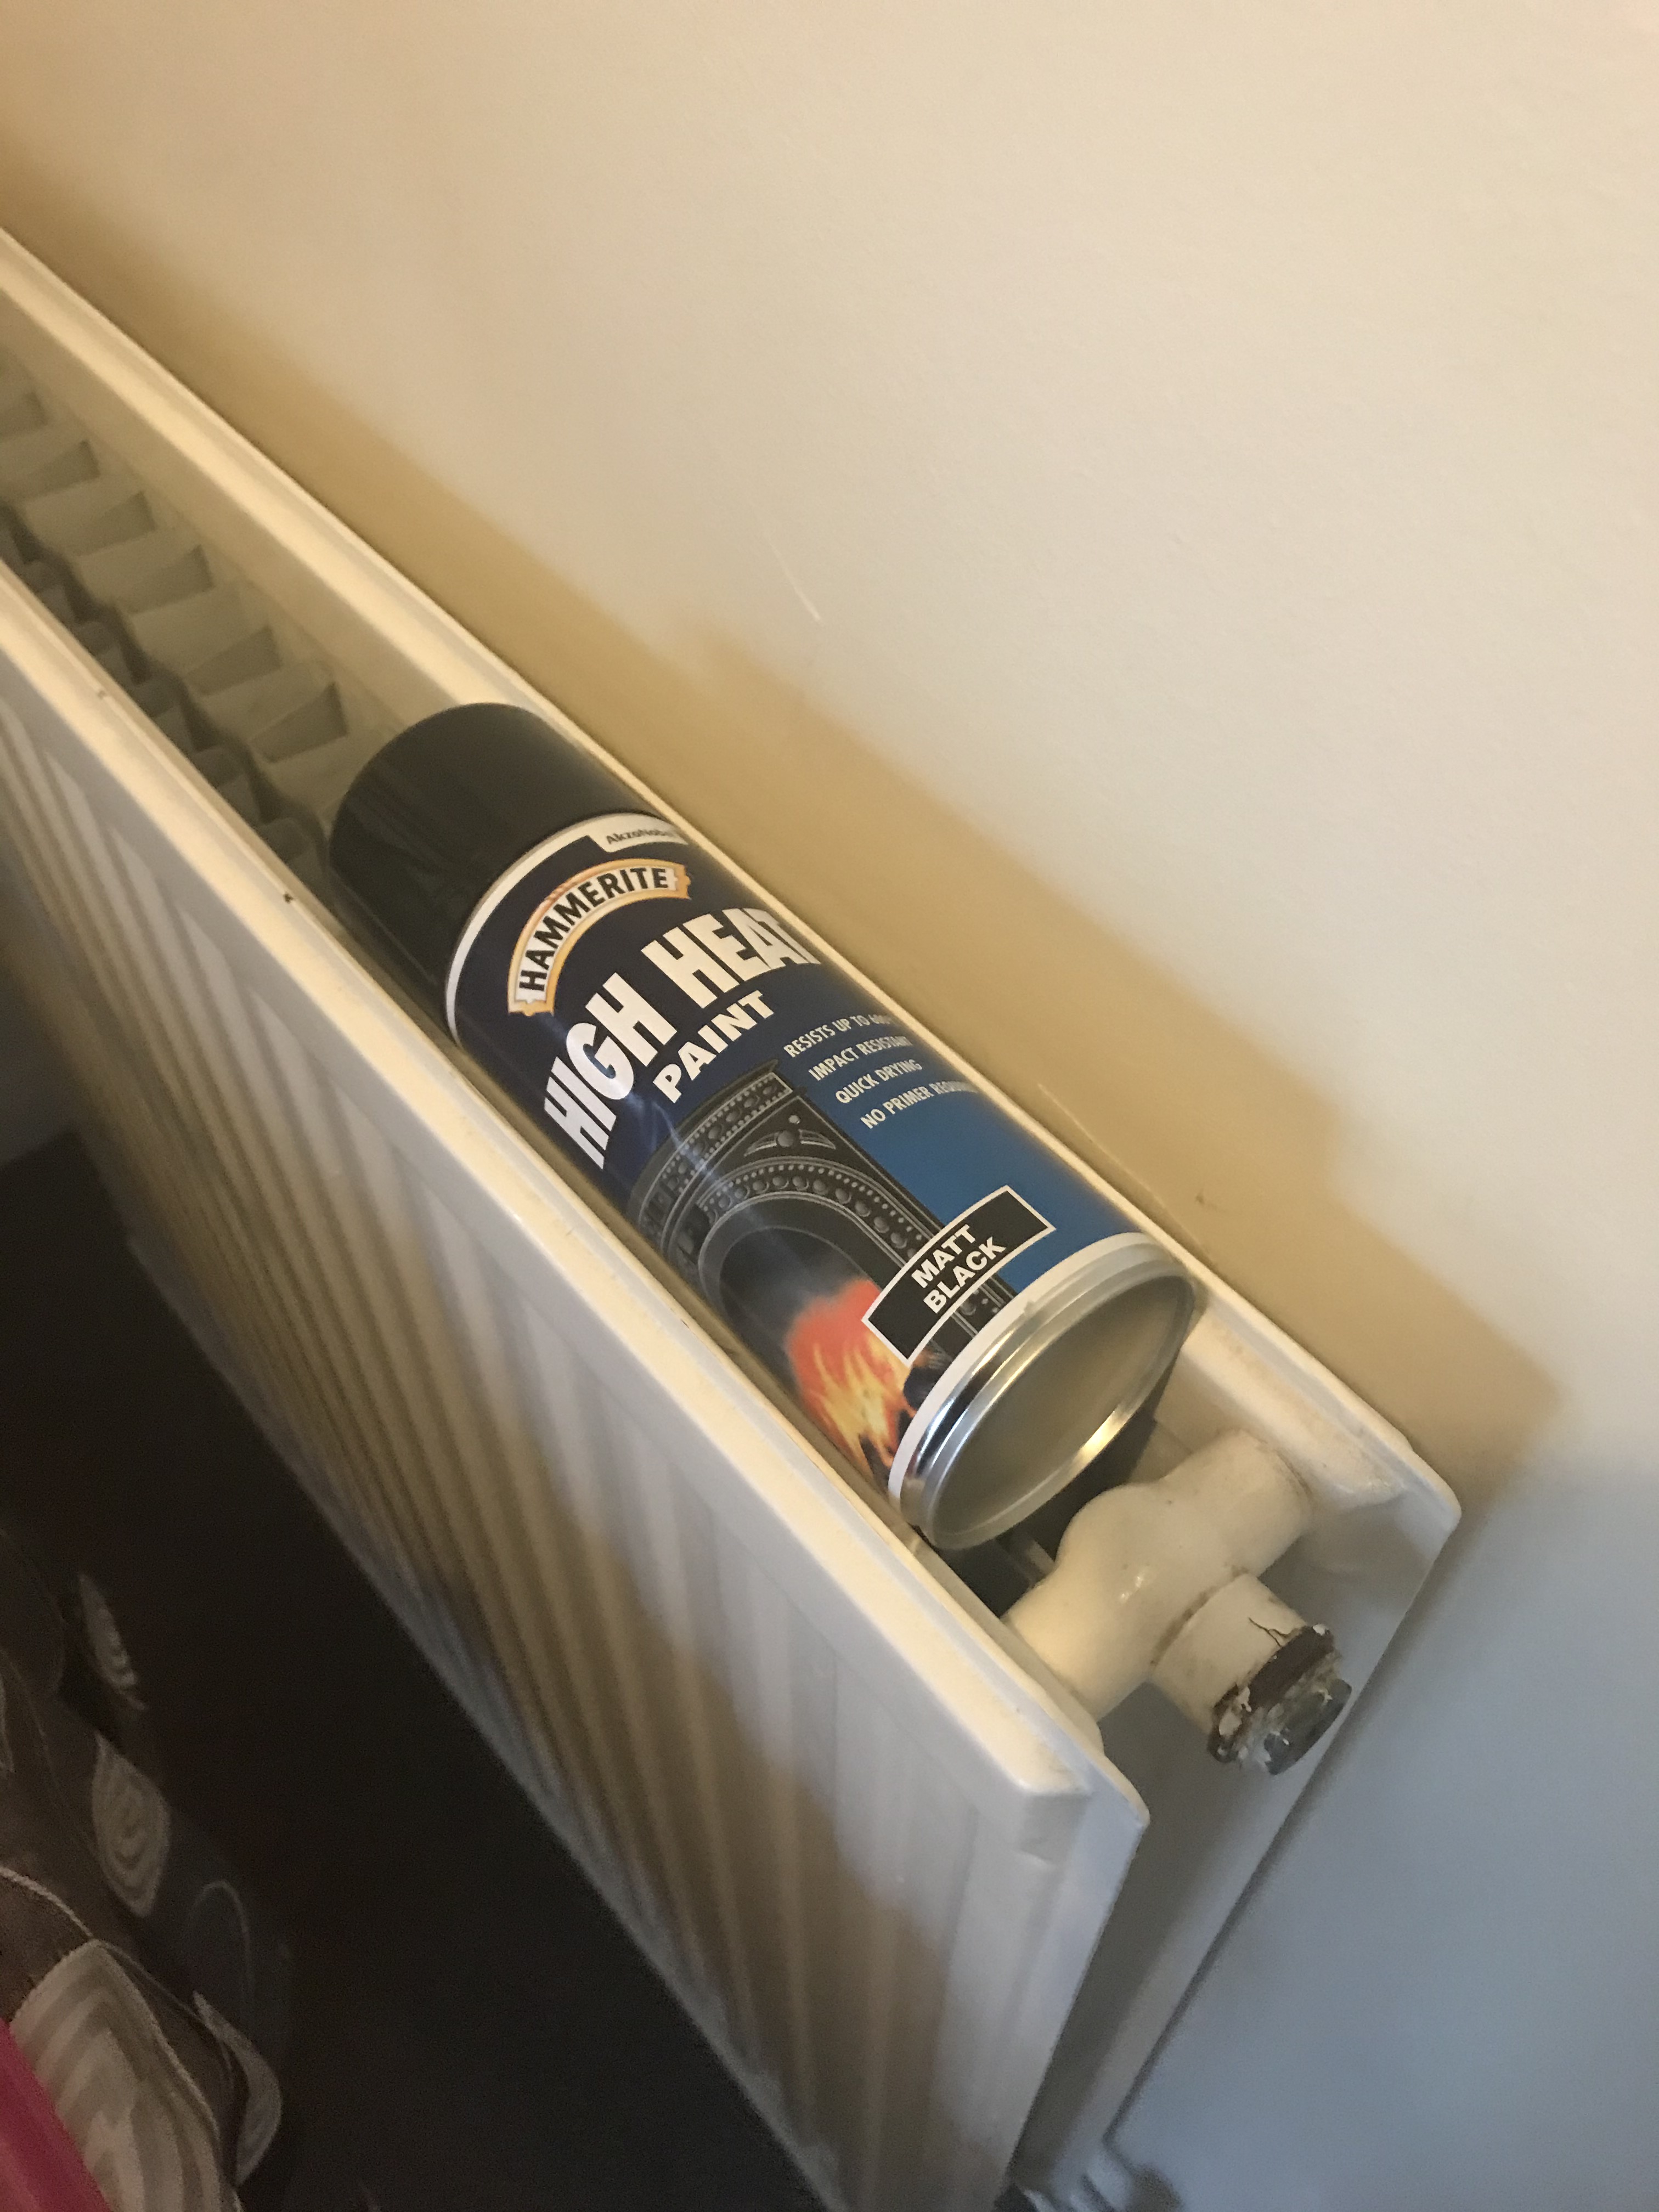
Anyway, to catch up I did paint the mounting plates with three coats of a heat resistance, matt black spray paint. I mocked myself up a little spray booth and preheated the paint on the radiator. I was pretty happy with the results:

Here is a picture of the problem I was having with the bolts included in the kit. The bolt should actually be fitted the other way around but I was getting desperate at this point!

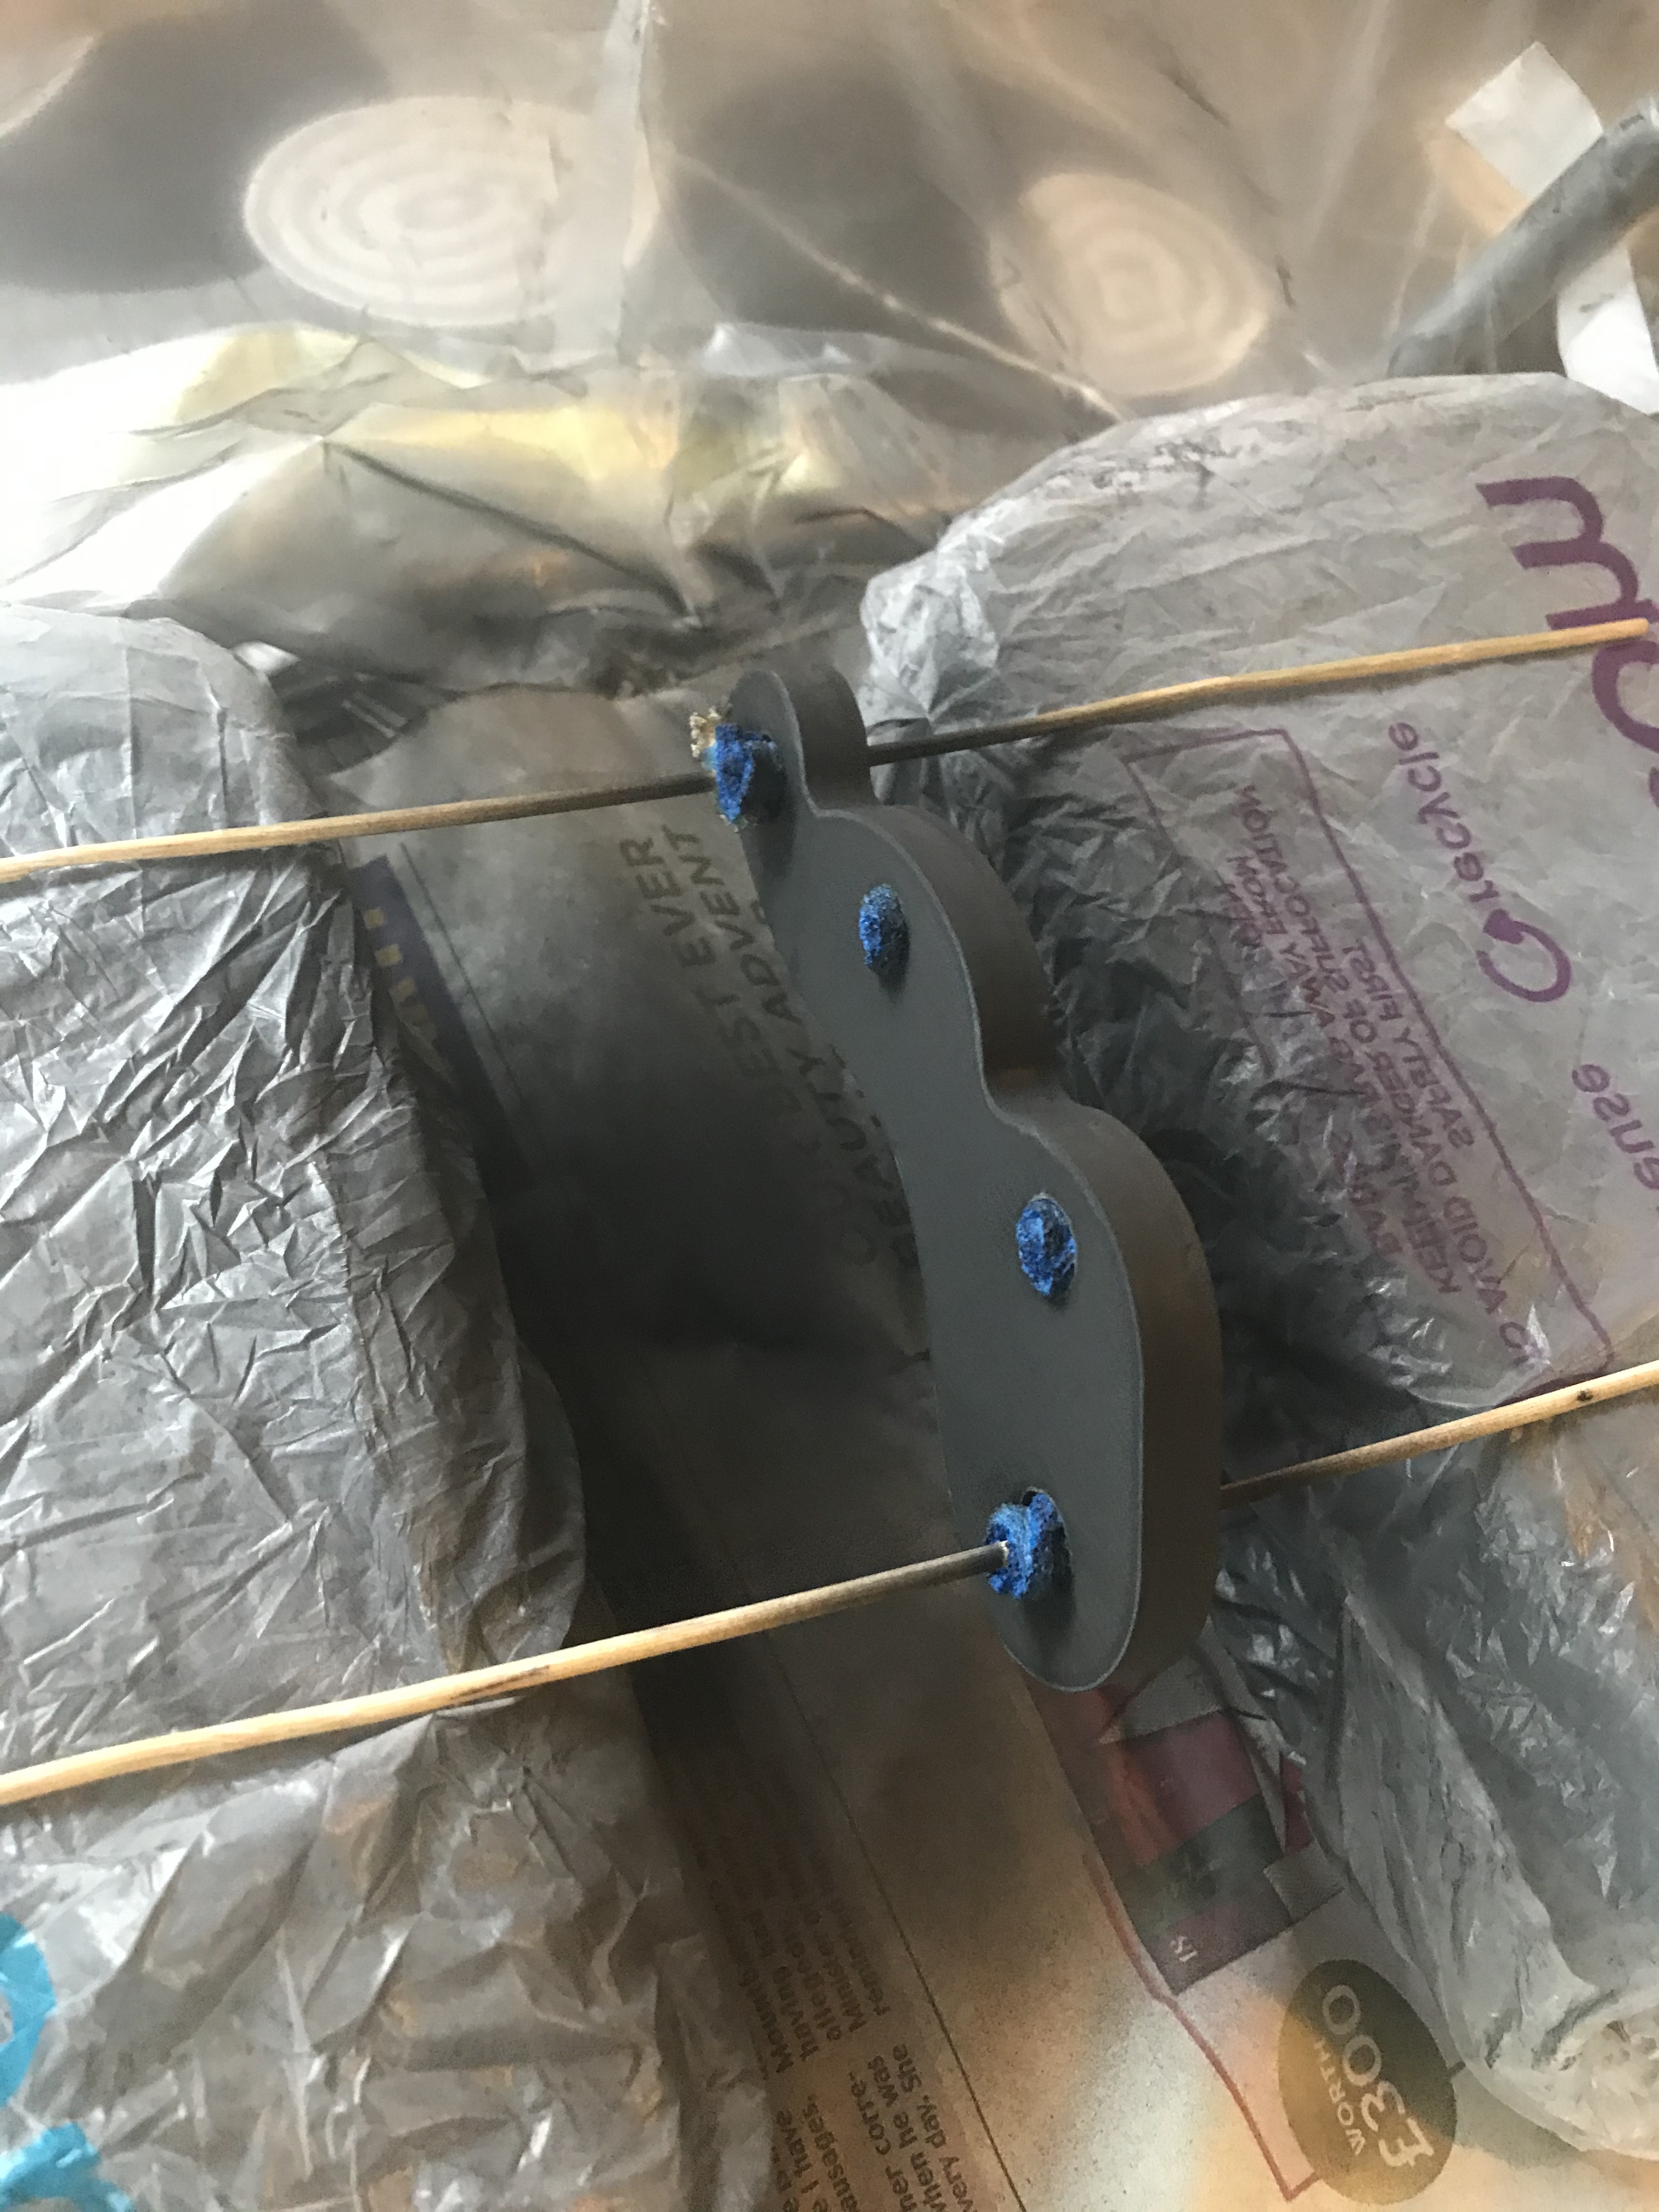
I actually ended up ordering some 20mm, M8 bolts and using these to secure all parts of the kit (mounting plates and callipers). I also used 2mm spacers to centre the calliper on the disc. Here’s a couple pictures of the 20mm bolt clearance and the spacers:


In the right hand picture the spacer can be seen between the matt black mounting plate and the gloss black calliper.
Once I’d got the new kit physically installed it was time to plumb it in. I made a bit of a mess of this too! I didn’t appreciate that these:


are flare nuts and require a special wrench. The wrench looks like a socket with a slot cut in. Once I’d got a set of these it was a relatively simple task (if not a bit fiddly) to connect the new braided brake hoses.
I’ve bled the brake and taken her out! It will take 500 miles to run in the new pads. I’ve done about 50 of these so far and the new setup feels much more solid. Better response on first applying the brake. I haven’t yet done any heavy braking as I should probably but another few 100 miles on them before I do. I can see that the pad is cleaning the whole of the disc.
I’m still not too happy how the new hoses look, they are a bit twisted. However, they don’t foul on anything and it would mean bleeding the brakes (again) to loosen the brake lines and straighten them up. I’ll leave it until I need to bleed the brakes to reorient them.
This job is done!
