
I was warned before I bought the car that it can get quite hot when stationary in traffic. I experienced this on the drive back home when there was some motorway congestion and it didn’t take long for the warning lights to start coming on. Other than the warning lights, there was no visible indicator that there was a problem until after my second weekend expedition. When I returned to the car there was a small puddle of coolant under the near-side front of the car. Further investigation was warranted!
I desperately want to get the car out on the track but I won’t be popular with the other track users if the radiator fails. Plus, I need to drive the car to and back from the circuit. It’s worth taking the time to make sure this is sorted out.
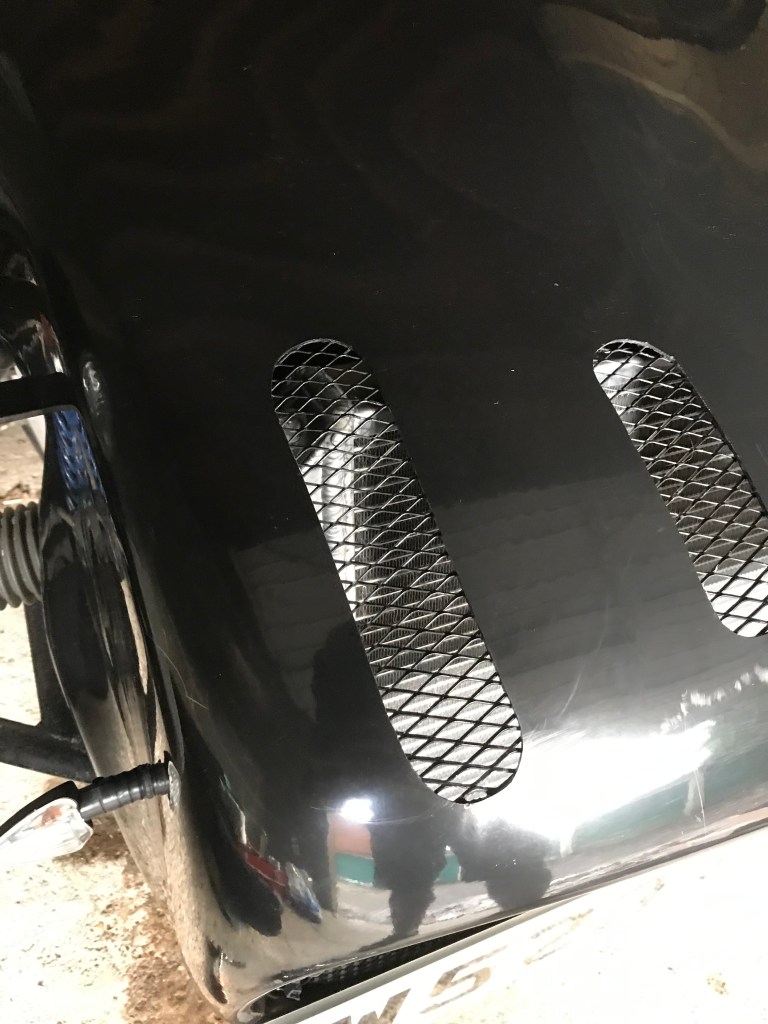
Radiator leak

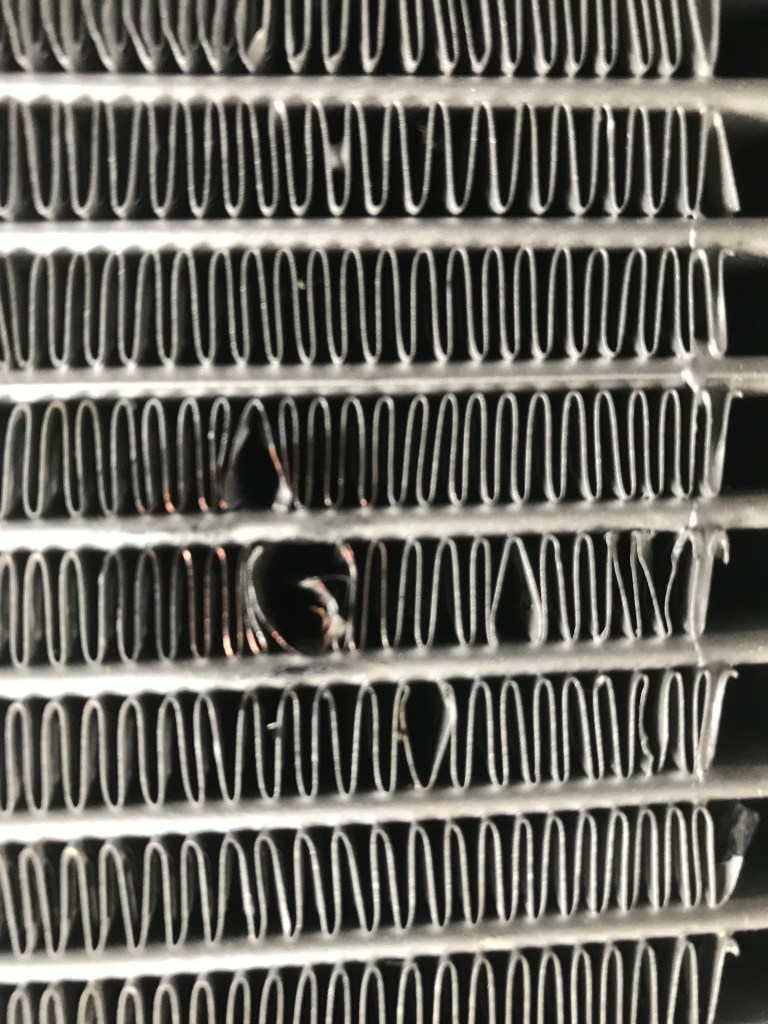
Leak seen from the back of the radiator 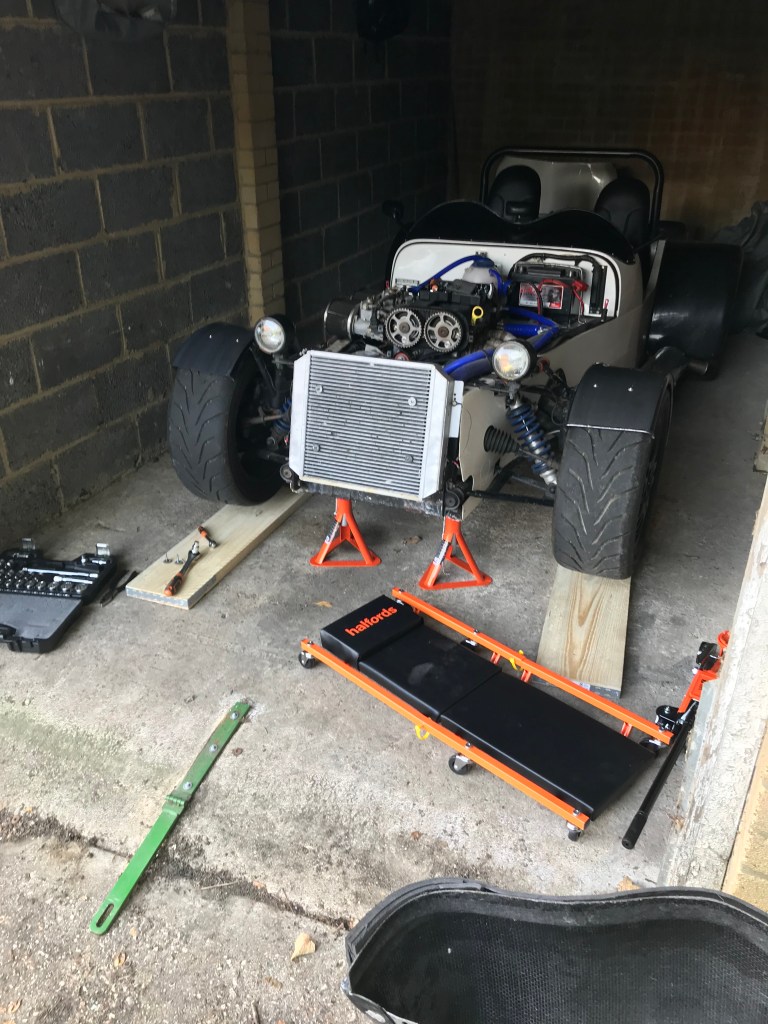
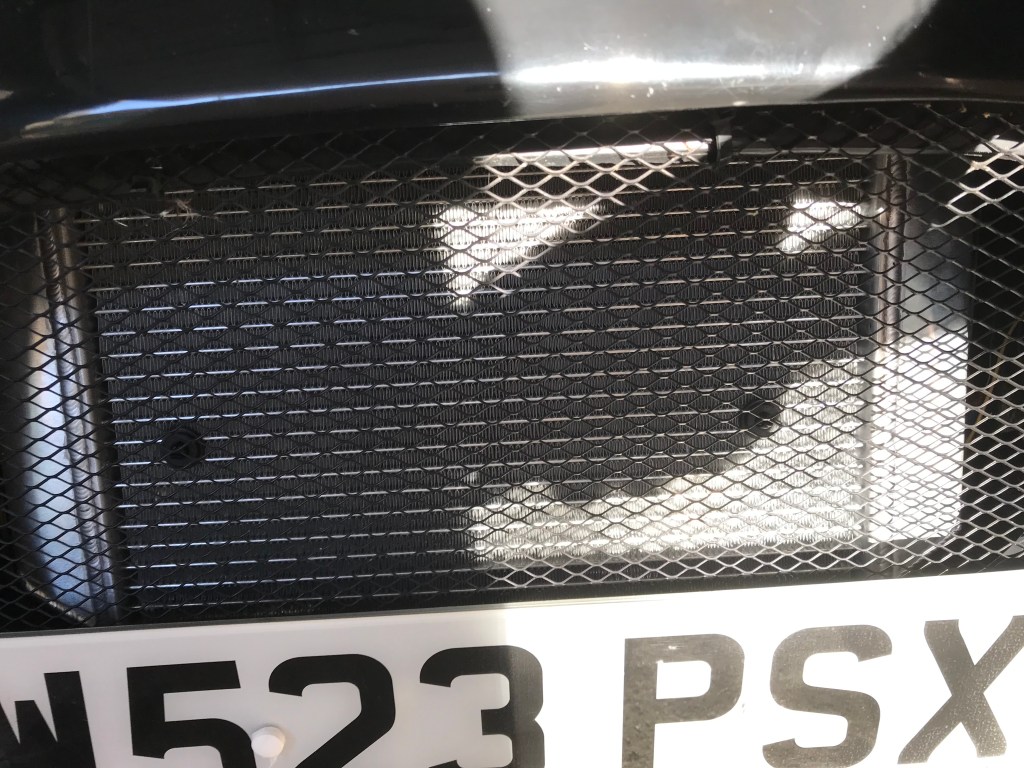
Front end of the tiger with nose cone and bonnet off 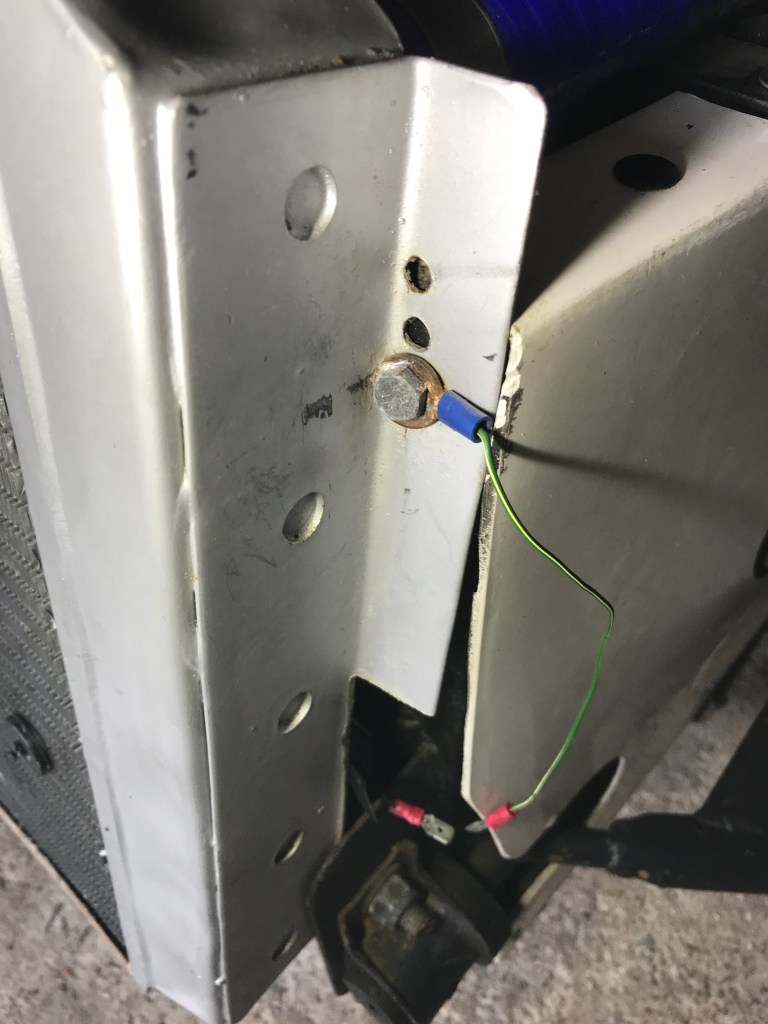
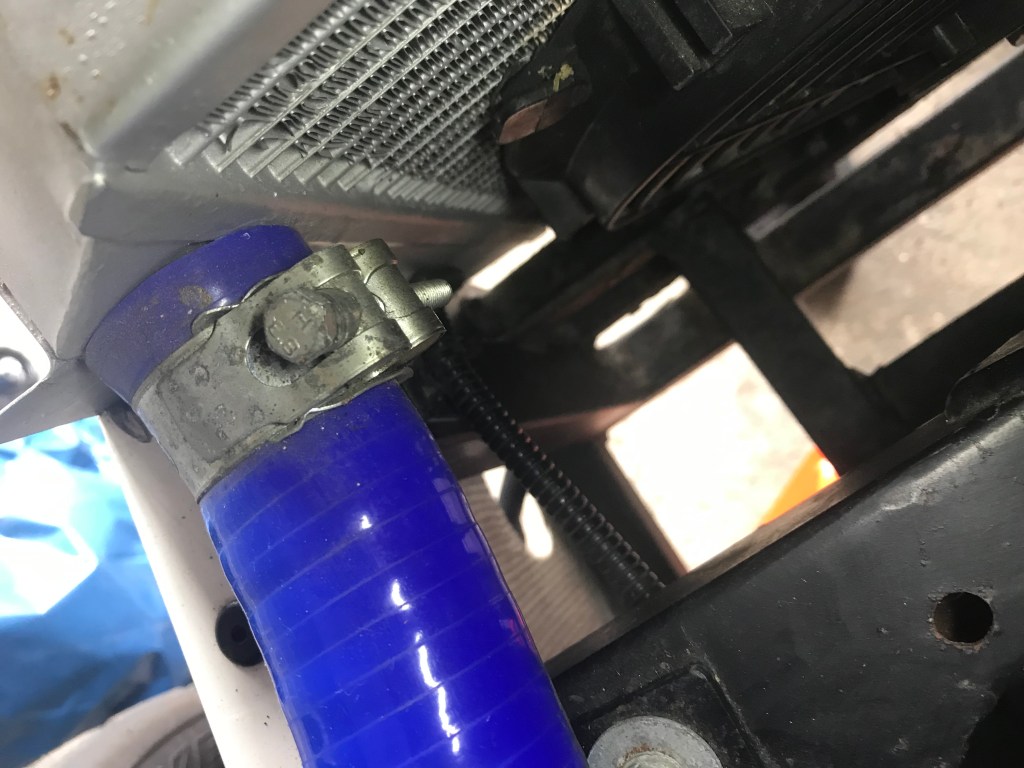
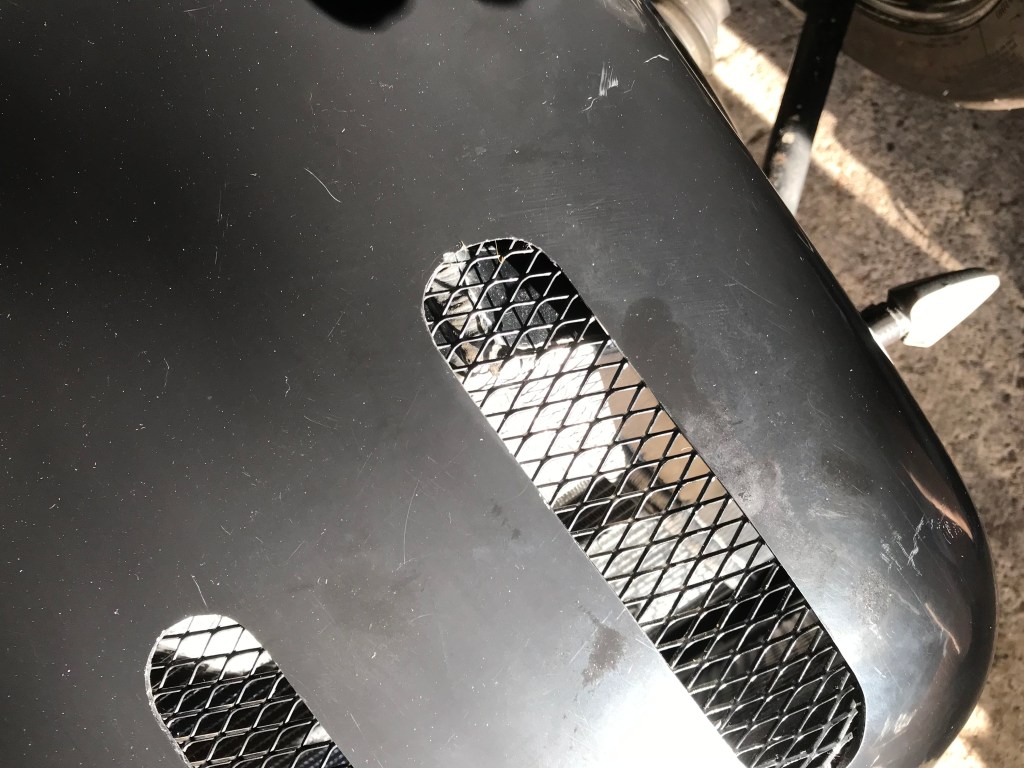
Radiator bracket detail
24/08/2019: Once I had taken the nose cone off (actually a bit of a fiddle as the twin carbs get in the way of one of the bolts and I had to disconnect the indicator wiring which I was a little nervous about) it became clear that there is a leak coming from somewhere in the upper left quadrant of the radiator core. You can see in the picture above where the coolant is wetting the vanes/fins (if that’s the correct technical term?) and running down the side of the radiator.
It seems that the plastic fan fixing has been over tightened and this might have cracked one of the channels in the radiator. Not sure if this is possible but it’s my best guess at the moment. I’ll know more when I get the radiator off. I’m not going to do this though until I have an idea of where to source a replacement as I think a replacement is the only sensible way forward.
I think there is a good chance that a previous owner, I suspect not the chap I bought it off who only did a few 100 miles in it over three years, knew about the leak and added some leak sealer. This has probably started to fail and might have even blocked up some of the other channels explaining the poor cooling. I’ll know more once I have a look when I’ve done the repair.
I’m going to take my time before identifying a way forward as there are a couple of considerations. The current radiator is really squeezed into the space available. I can’t go 1mm bigger on the width or height of the radiator as only just fits as it is. There might be some scope for going a little deeper. It looks like some alteration to the brackets were made to make this radiator fit. I’m not against giving this a go, if I need to, but I don’t have the tools and this would be the first time doing this type of modification.
30/08/2019: Okay I’ve looked into four options for moving forward.
- A ‘stock’ radiator supplied by Tiger.
- A Radtec racing radiator supplied by demon-tweeks.
- A replica radiator created from my current radiator or a recore of the existing radiator done by Aaron Radiator.
I won’t keep stressing how little experience I have (that will get boring) but I’m facing my first big purchasing decision (okay… the car was a bigger purchase) and I’ve trawled the internet looking for advice. The perceived wisdom seems to be not to go with a stock radiator. I think what is moving me away from the Tiger exhaust is I can see the additional inlets and outlets for the heating system which would need to be blanked as I don’t have a heater. The other options wouldn’t need this.
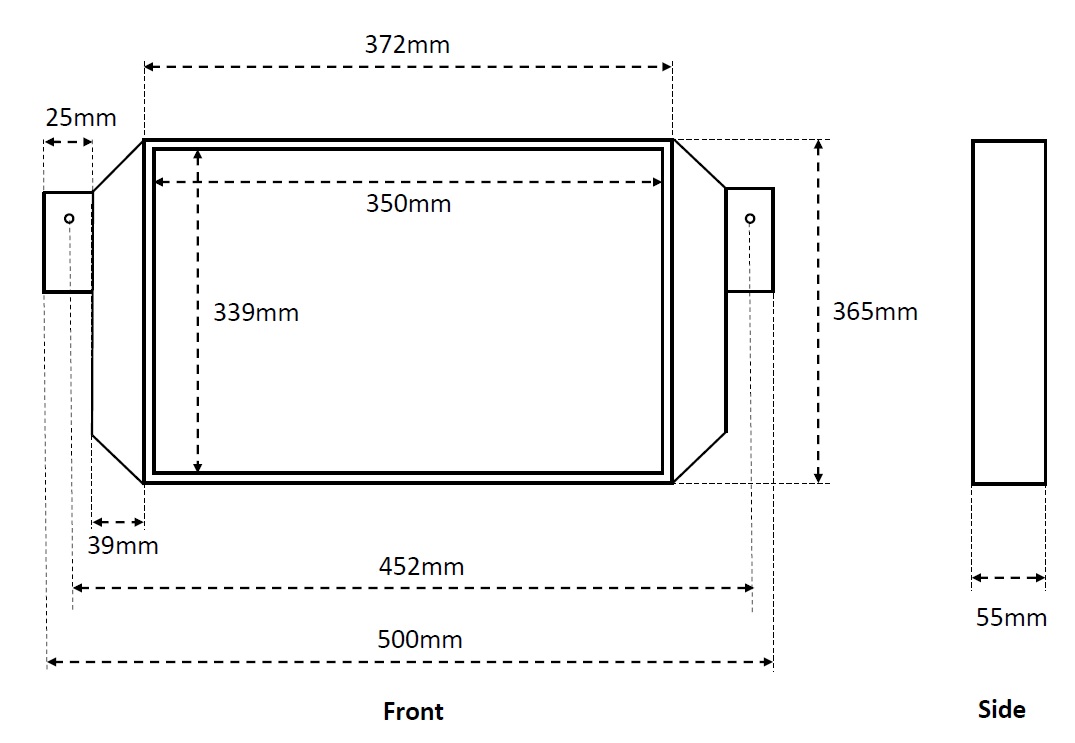
I’ve taken the best measurements I can and have sent these off to Aaron Radiator to get a quote for both the creation of a replica and recoring of the original. I’m hoping to hear back early next week.
The Radtec is a little pricey and I would need to cut the brackets to fit the radiator.
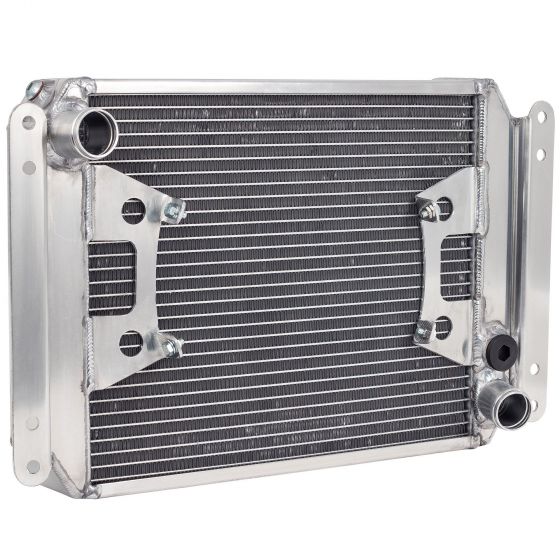
There isn’t really a way for me to progress this until I hear back from Aaron Radiators so I’ll park this for now. I’ve popped a few pictures below (Radtec left, Tiger bottom right and the dimensions of my current radiator top right). You can get to these by following the links in the list above.

09/09/2019: There wasn’t much to do to get the Tiger back on the road but sourcing parts is turning out trickier that I thought. Aaron still haven’t got back to me and I phoned demon-tweeks this morning. The Radtec on their webpage has no dimensions and it feels a bit risky to buy a part without knowing it will fit. Particularly as the chap at demon-tweeks was clear this is a custom order part… returns would be difficult.
I’ve just filled in the contact form on Radtec’s webpage asking if the radiator is for a super six or for the RT6 and the dimensions. Fingers crossed that they get back to me quickly. I’ve also dropped a reminder e-mail to Aaronradiators. Let’s hope that they get back to me too.
10/09/2019: We are back moving again! The guys at Radtec were great and got back to me quickly with a very competitive quote. Turns out the advertised ‘Tiger’ radiator is actually for a Caterham and wouldn’t fit. They did offer to make me a custom. However, I’d already contacted Custom Made Rads and they were extremely helpful and communicative. At just over £300 they were a bit more expensive than Radtec but I was convinced by their testimonials and extremely prompt customer service. I’ve convinced them that it is worth me pulling my radiator off and sending to them as a template. So here are some action shots:
Top hose connection 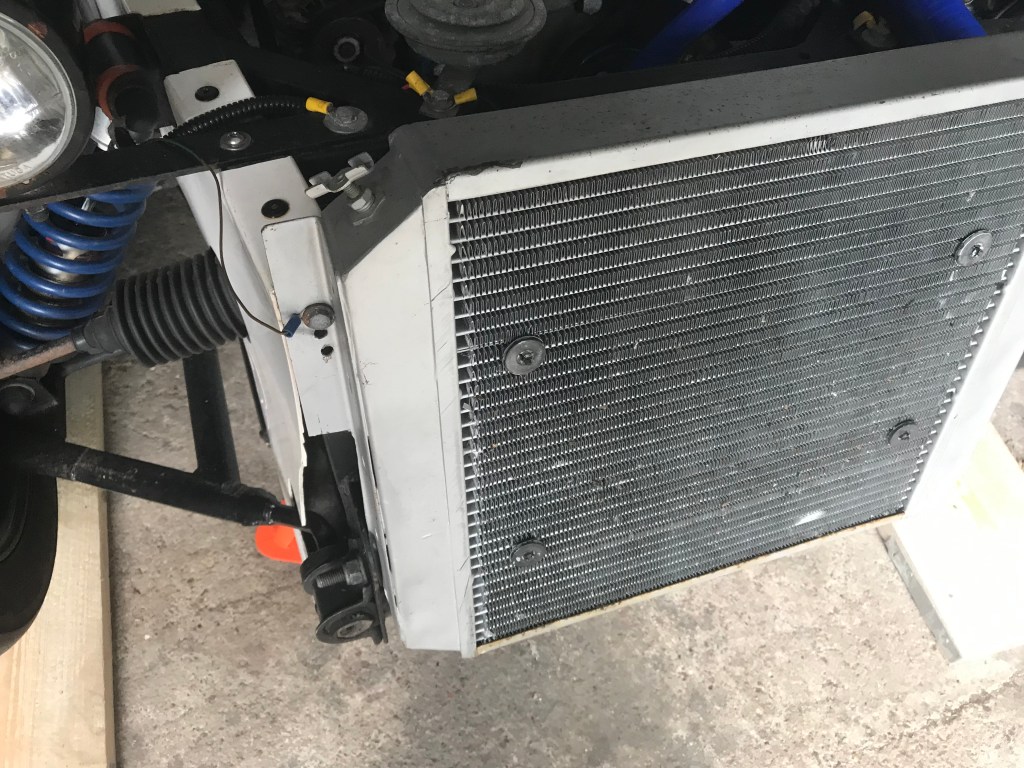
Front of the radiator 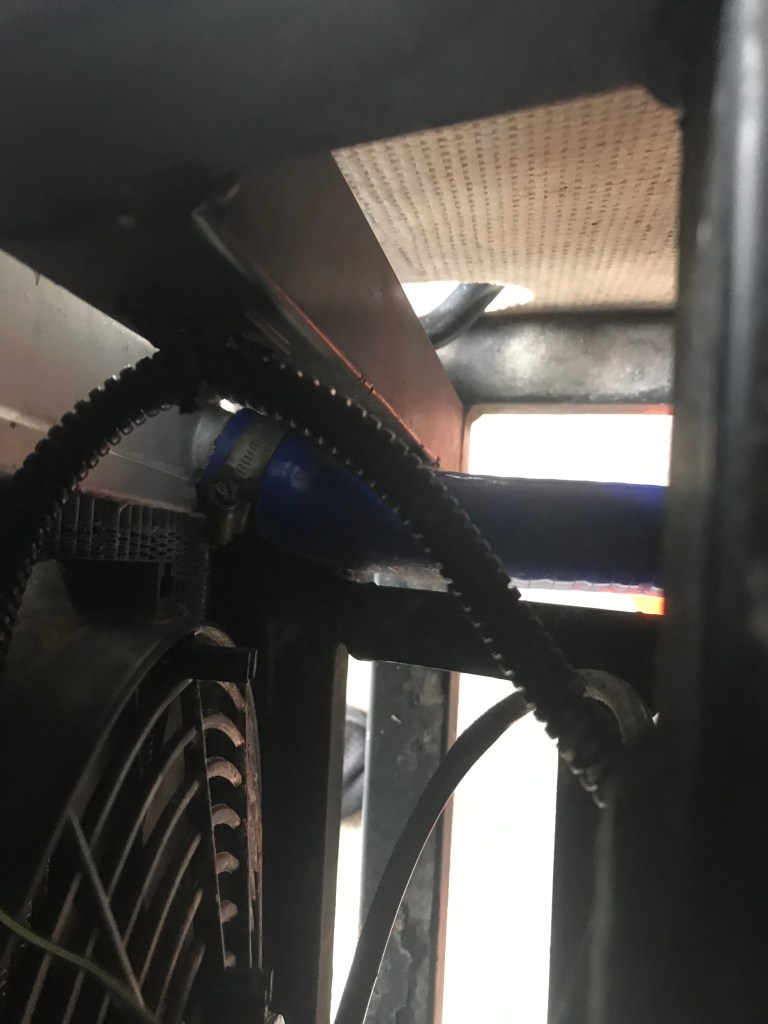
Low hose connection
The job was simple enough. A case of two bolts to take out, four plastic fan clips to remove and two hoses.
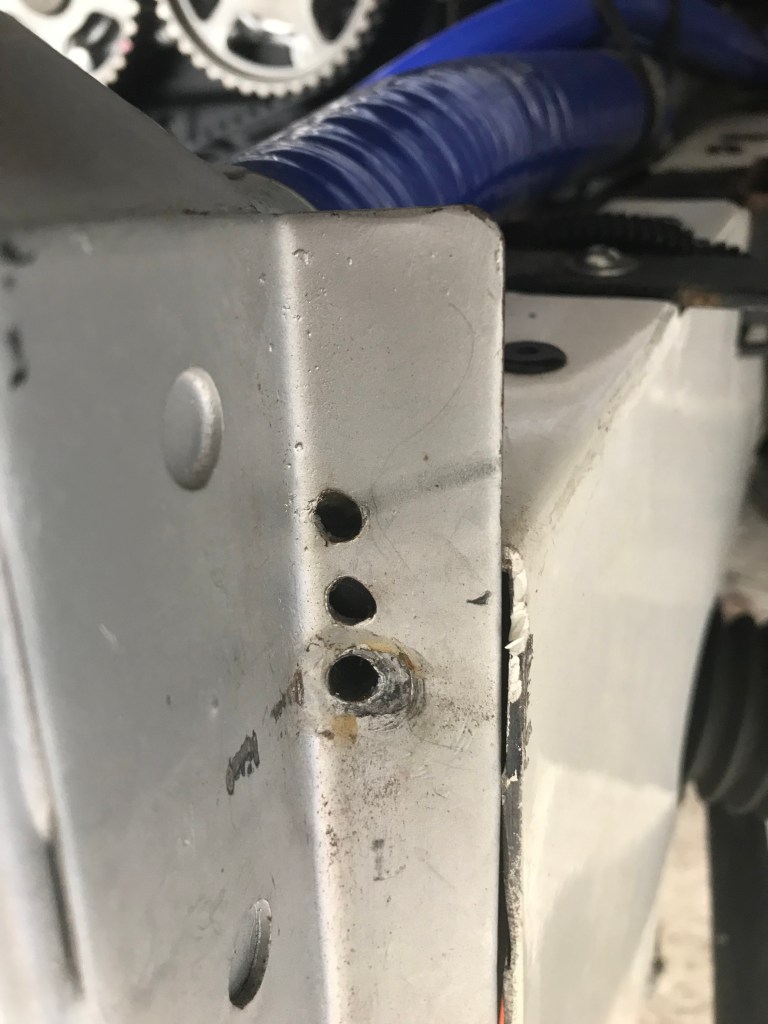
Its quite clear from the ‘practice’ holes that there was a little bit of trial and error in fitting this radiator in the first place. I’m hoping that the new one is a little tidier and quite a bit of the mounting bracket stands proud of the chassis of the car. I don’t think this serves any purpose and did foul on the nose cone a little. I’ll see if Custom Made Radiators can either mount a smaller bracket or round it off a bit more to match the contour of the nose cone.
Unbolting the radiator gave it a bit of wiggle room and the next task was to disconnect the fan. I was correct that this is what had caused the leak. Only one of the plastic fan clips was tight and I suspect the vibrations (the radiator was bolted directly to the chassis with no rubber mounts) had stressed that part of the radiator and it had cracked.
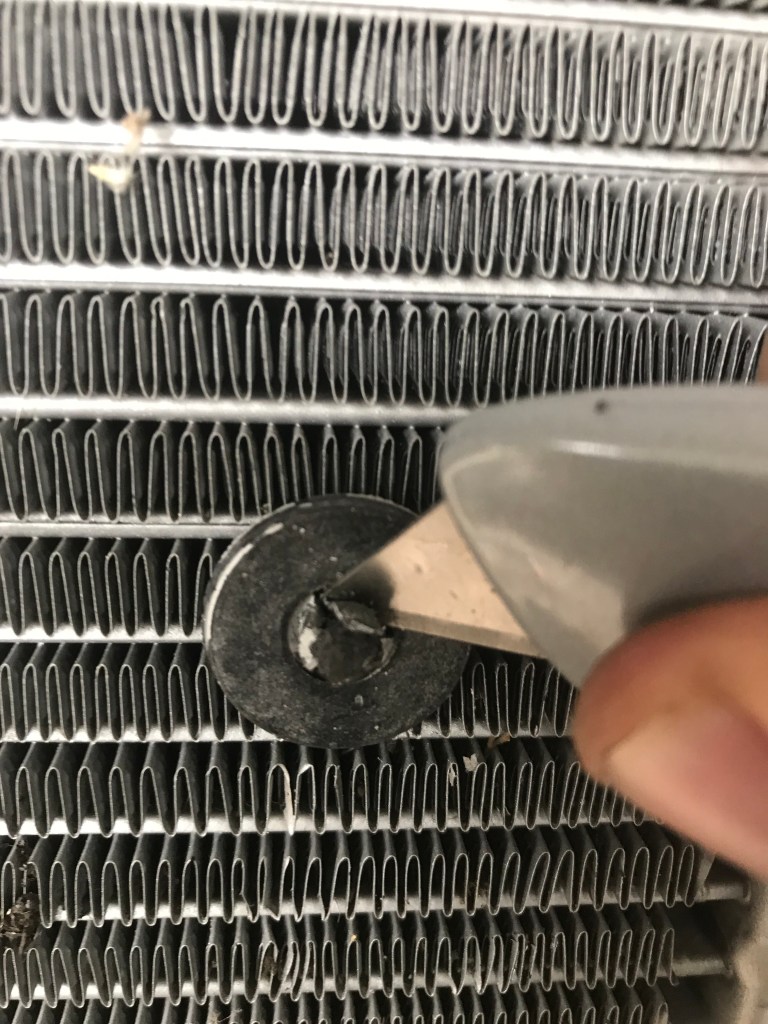
Cutting the fan clips.
Removing the clips was as simple as cutting the small pieces of plastic that gripped the clip (see the right hand picture above).
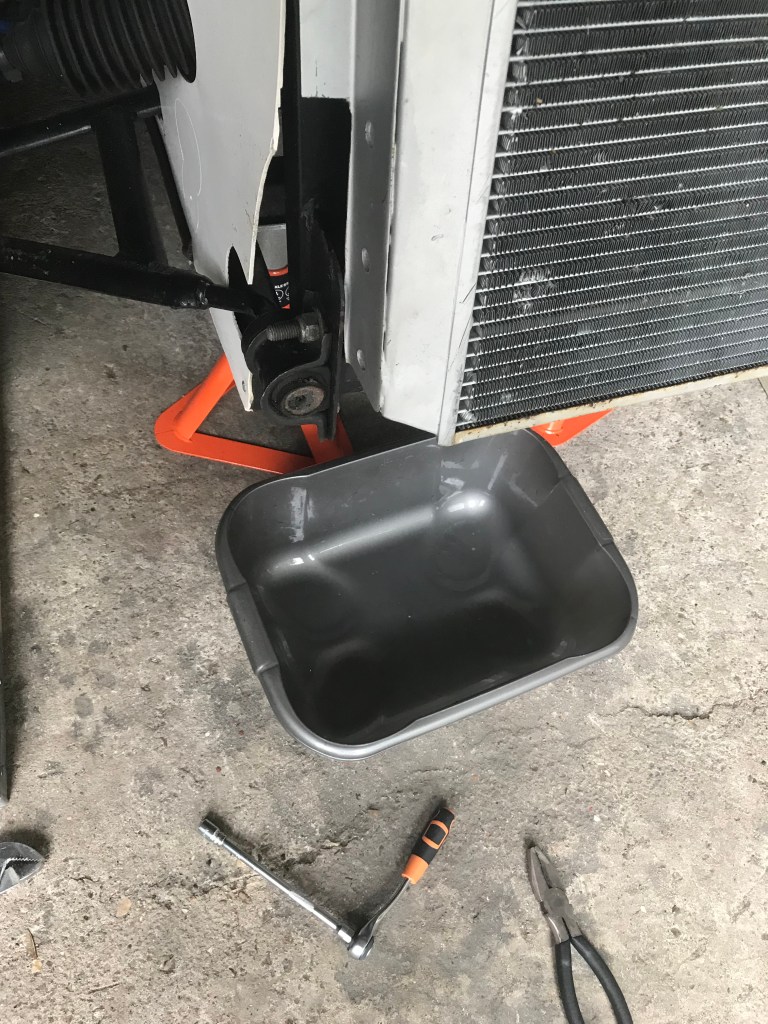
I lined up the basin and disconnect the lower hose. My aim wasn’t too bad and I caught most of the coolant. I did think about storing this and reusing it but it was pretty sludgy! I will flush the system with some deionised water and I’m now kicking myself that I didn’t do a proper clean out with the old radiator attached. O well… live and learn. I’ll flush as much of the system as I can before connecting the new radiator and then run a few flushes with the new radiator attached.
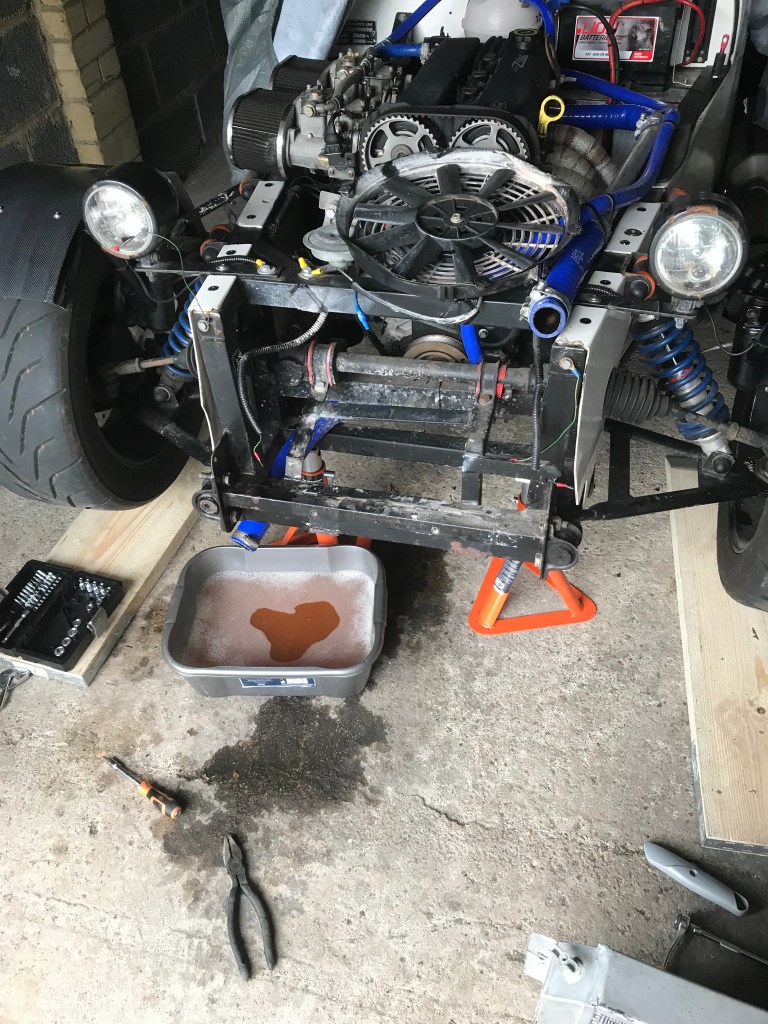
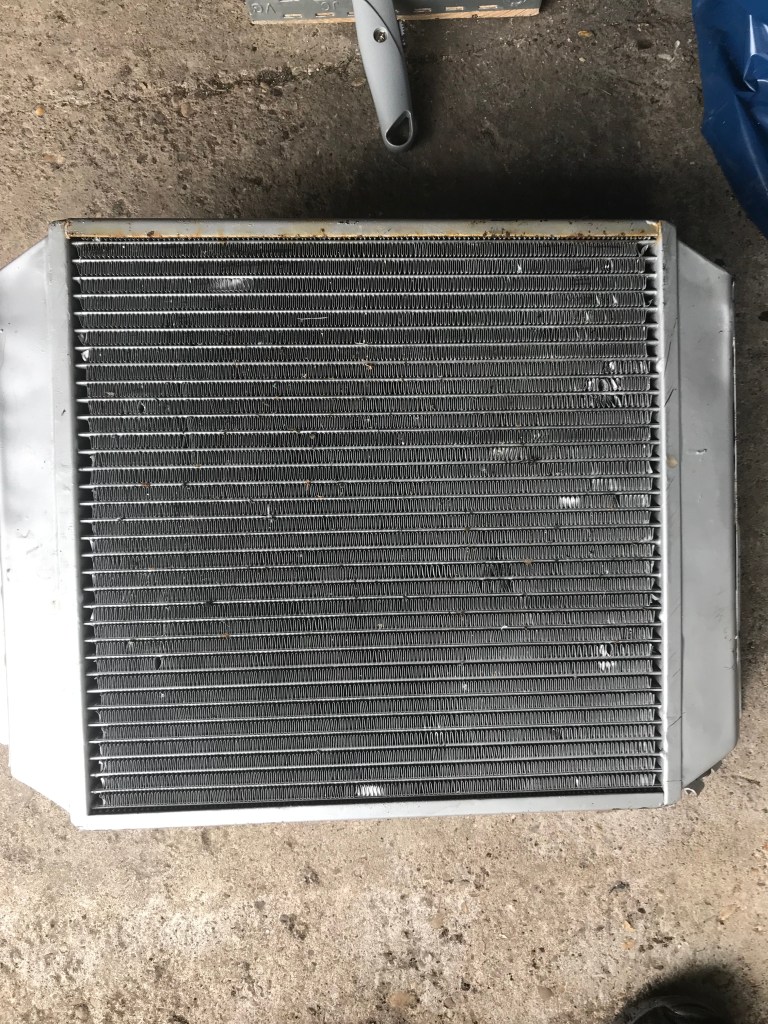
A few last pictures of the radiatorless car (with a full basin) and the radiator free of the car.
It’s pretty clear the damage that was done with the fan clips. I must make sure that I understand how to mount the fan properly so I don’t repeat this. If I do then it’s quite an expensive mistake!
And finally, I have the car on planks so that I can fit my jack under. The angle meanS that the hose which runs from the reservoir to the T-junction just before the lower radiator inlet, which passes up and over the metal pipe that is the cold feed to the engine (I’m assuming it’s metal because it passes close to the exhaust down pipes and plastic might melt?), was now the highest point in the system. This was stopping the reservoir from draining. Rather than faff around taking the car off the planks I unbolted the reservoir and lifted it so that the last coolant drained.

So, the radiator is now off and ready to post to Custom Made Radiators. They think about a ten day turnaround. I’m going to entertain myself by cleaning as much of the engine bay as I can get to and by starting to clean off and cover some of the surface rust. I also spotted what I think is the casting mark on the side of the block. It’s in an awkward place (and I needed to get home for the dog!) so I’ll try and get to this next time I’m at the garage which is likely to be this weekend.
11/09/19: So, I’ve disappeared down a rabbit hole of reading yesterday evening! There’s so much to understand and learn. You might have spotted the coppery glint on the core of the radiator in the pictures above. My new radiator is going to be aluminium and the old, I now believe, is copper.
There are a few things it seems I should consider. The first is corrosion, either galvanic or electrolytic. By switching from copper to aluminium it now means that if galvanic corrosion is present the aluminium of the radiator will corrode rather than the iron of the block (as is the case with copper radiator). My understanding of chemistry is pretty good (in a past life it’s what I did) and I should have thought of this. This article explains it pretty well and seems sensible to me. A small amount of galvanic corrosion in the block, given its mass, is not a big deal. The same amount in a radiator might cause a leak.
I need to spend a little bit of time thinking about this. I’ll be running good quality coolant with deionised water and the correct proportion of antifreeze. This should suppress electrolytic corrosion.
The best way to prevent galvanic corrosion would be to insulate the radiator fully from the chassis (which is used as the ground connection). This would be achieved by using rubber mounts. There are a wide variety of these available and it would be the case of finding one that fits. It would also serve the purpose, I think, of insulating the radiator from vibrations. Back to that in a moment. I’m wondering though if it will be enough to run the high quality coolant, replaced every 12-18 months. This should prevent electric current flow through the coolant and therefore stop the engine/radiator/coolant system acting like a battery. I think I’ll put up a post on PistonHeads this evening and see what the community think. This isn’t a Tiger specific issue but I might pop something on the owners club forum too.
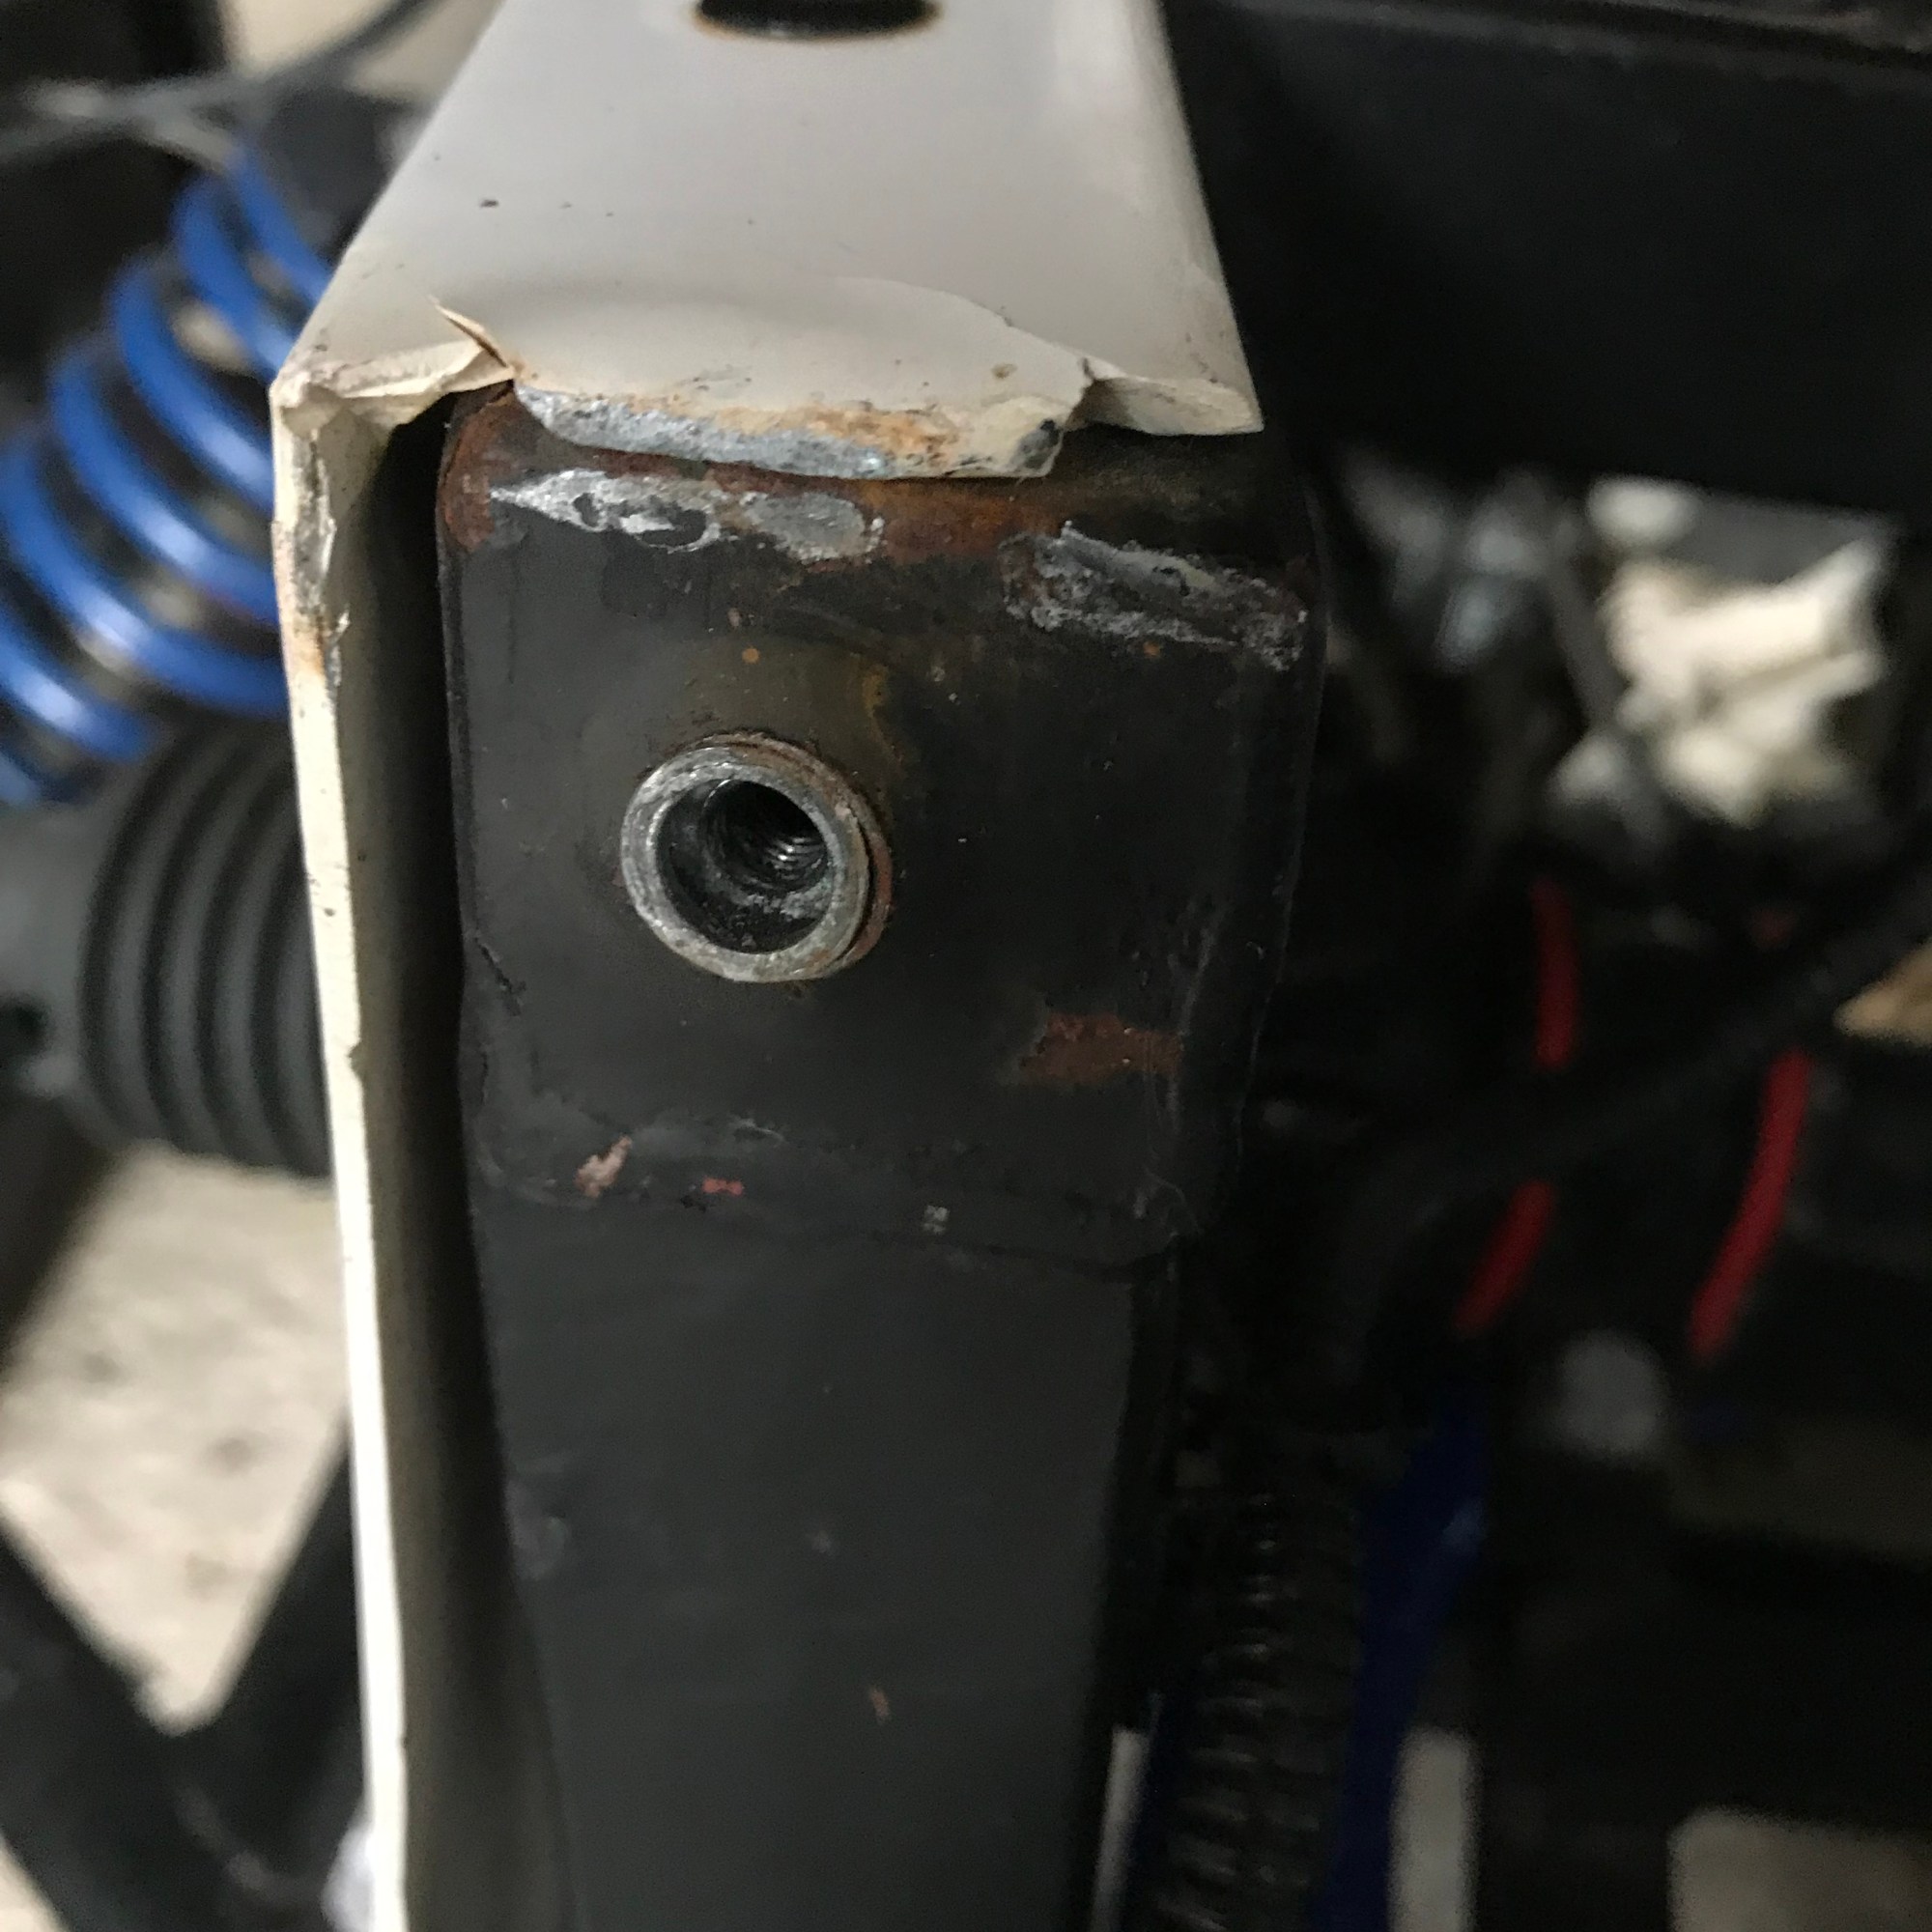
Just back briefly to vibrations. I think vibrations might have been what caused my current leak. I don’t think aluminium is as durable as copper so it will be even more important to get this right. Normally, I understand, radiators on Tigers are supported at the bottom and top with brackets and held against the chassis with a rubber spacer. This isn’t the case with my Tiger. The radiator is held, as you can see in the pictures above, by two bolts directly into the chassis.
Replacing these bolts with rubber mounts would do two things (at least!). The first is push the radiator forward. I’m not sure that I have the space for this. The second, and I’m just thinking this through, is create the potential that the radiator moves around a lot. Although the new aluminium radiator should be lighter it will still be full of coolant. Given the mounting point is two-thirds of the way up the radiator this will create quite a bit of leverage around this point. I’ll need to think this through a bit and I’ll probably post something on the Tiger owners forum this evening. I’d be interested to see how other owners have fitted their custom radiators given it seems to a popular aftermarket upgrade.
19/09/2019: A call from Custom Made Radiators today. Really helpful! I hope the radiator is as good as their customer service! I’m sure it will be. Darren spent a good ten minutes talking to me about the radiator and some bits and pieces to do with mounting and corrosion.
Seems like the outlet also had a small crack too. this might be because as the engine revs and moves around it was pulling on the radiator through the hoses. I think my engine is solid mounted. If so, if should be moving around too much. I suspect it’s because of the radiator has been squeezed into the space available and the outlet was very close to a chassis rail. Darren thinks I should so with a rubber mount if I can. I’ll have a think about this. He doesn’t think that bolting it directly to the chassis will lead to instant failure either. I’ll have to think about this.
My mind has been put at ease to do with the corrosion. It should be an issue with the quality of material they use. This coupled with the regular maintenance I’ll do will ensure that we are okay on this front.
This wasn’t the best news though, Darren will be starting the new radiator tomorrow and it might even be finished this week! Can’t wait to get it mounted, filled and the Tiger back out on the road.
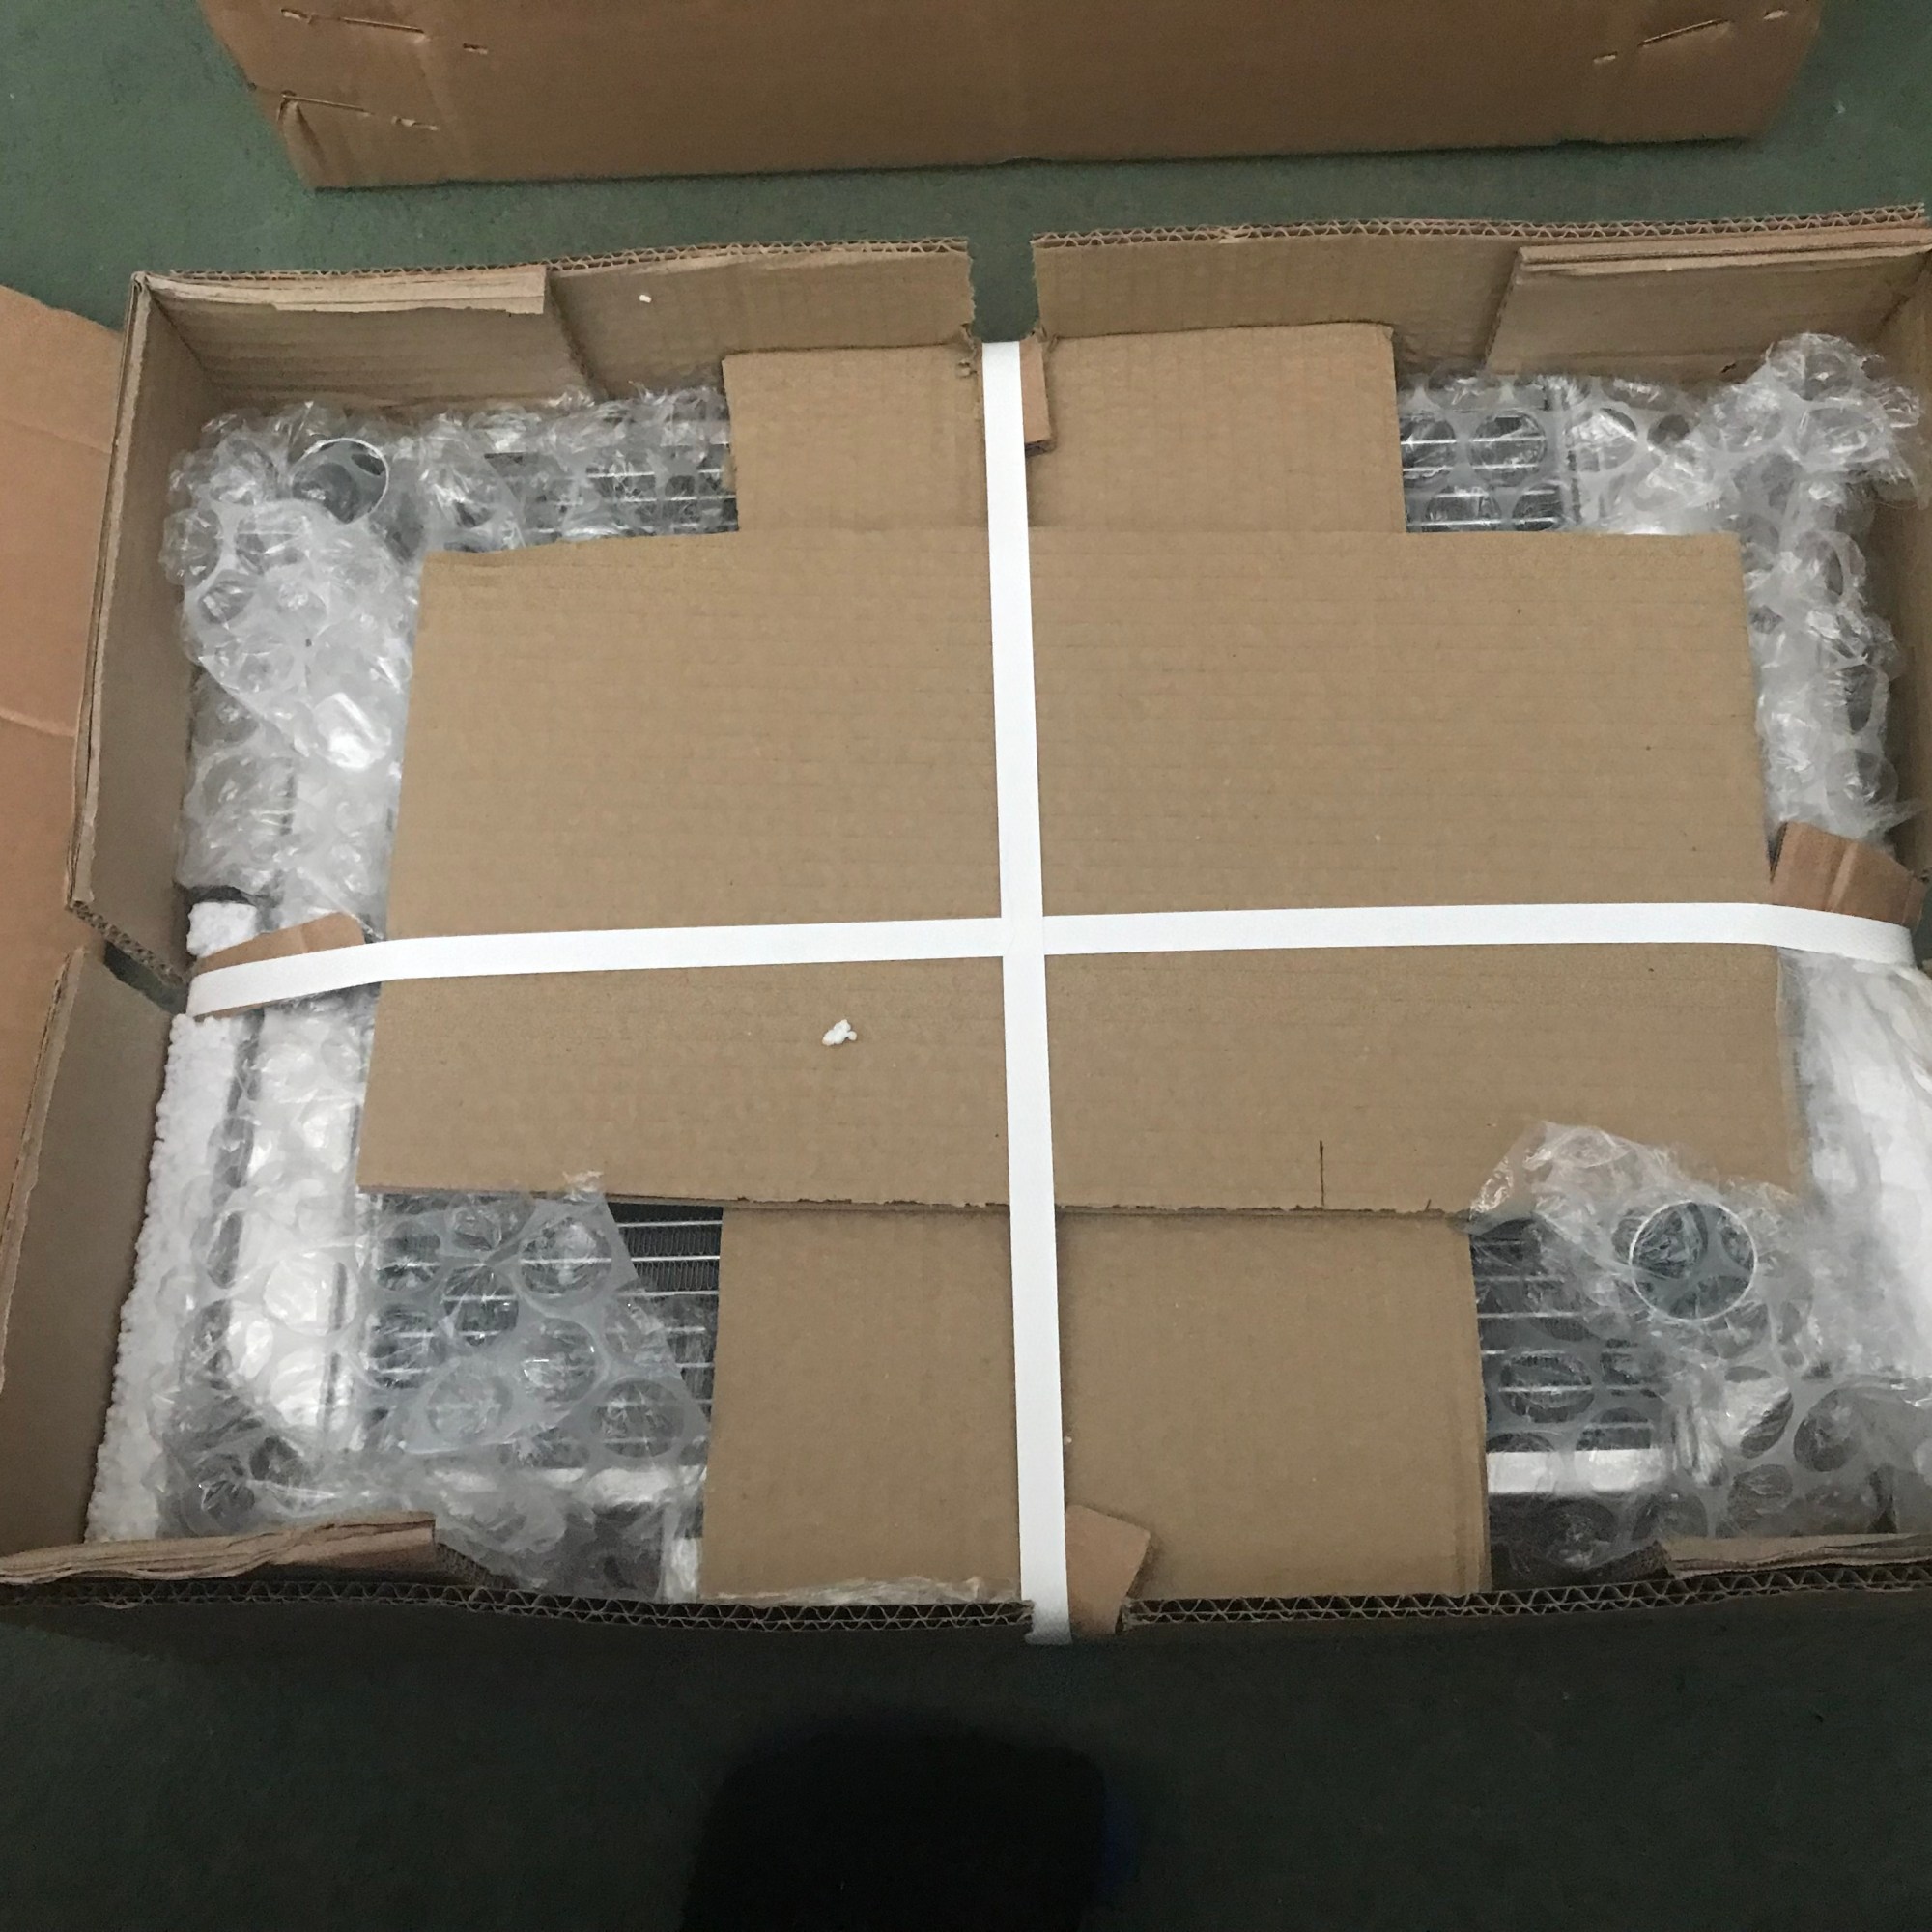
25/09/2019: The new radiator arrived yesterday and it is great. I can’t believe how much lighter it is than the old copper unit. It came extremely well packaged from Custom Made Radiators:

Couldn’t help but pop down to the garage this evening and see if I could get the whole thing back together. The only issue that I had is that one of the mount (not sure of the technical term) that the bolt would screw into was loose and fell back into the chassis. You can see the mount which was connected on the right and the one hiding in the chassis on the left:
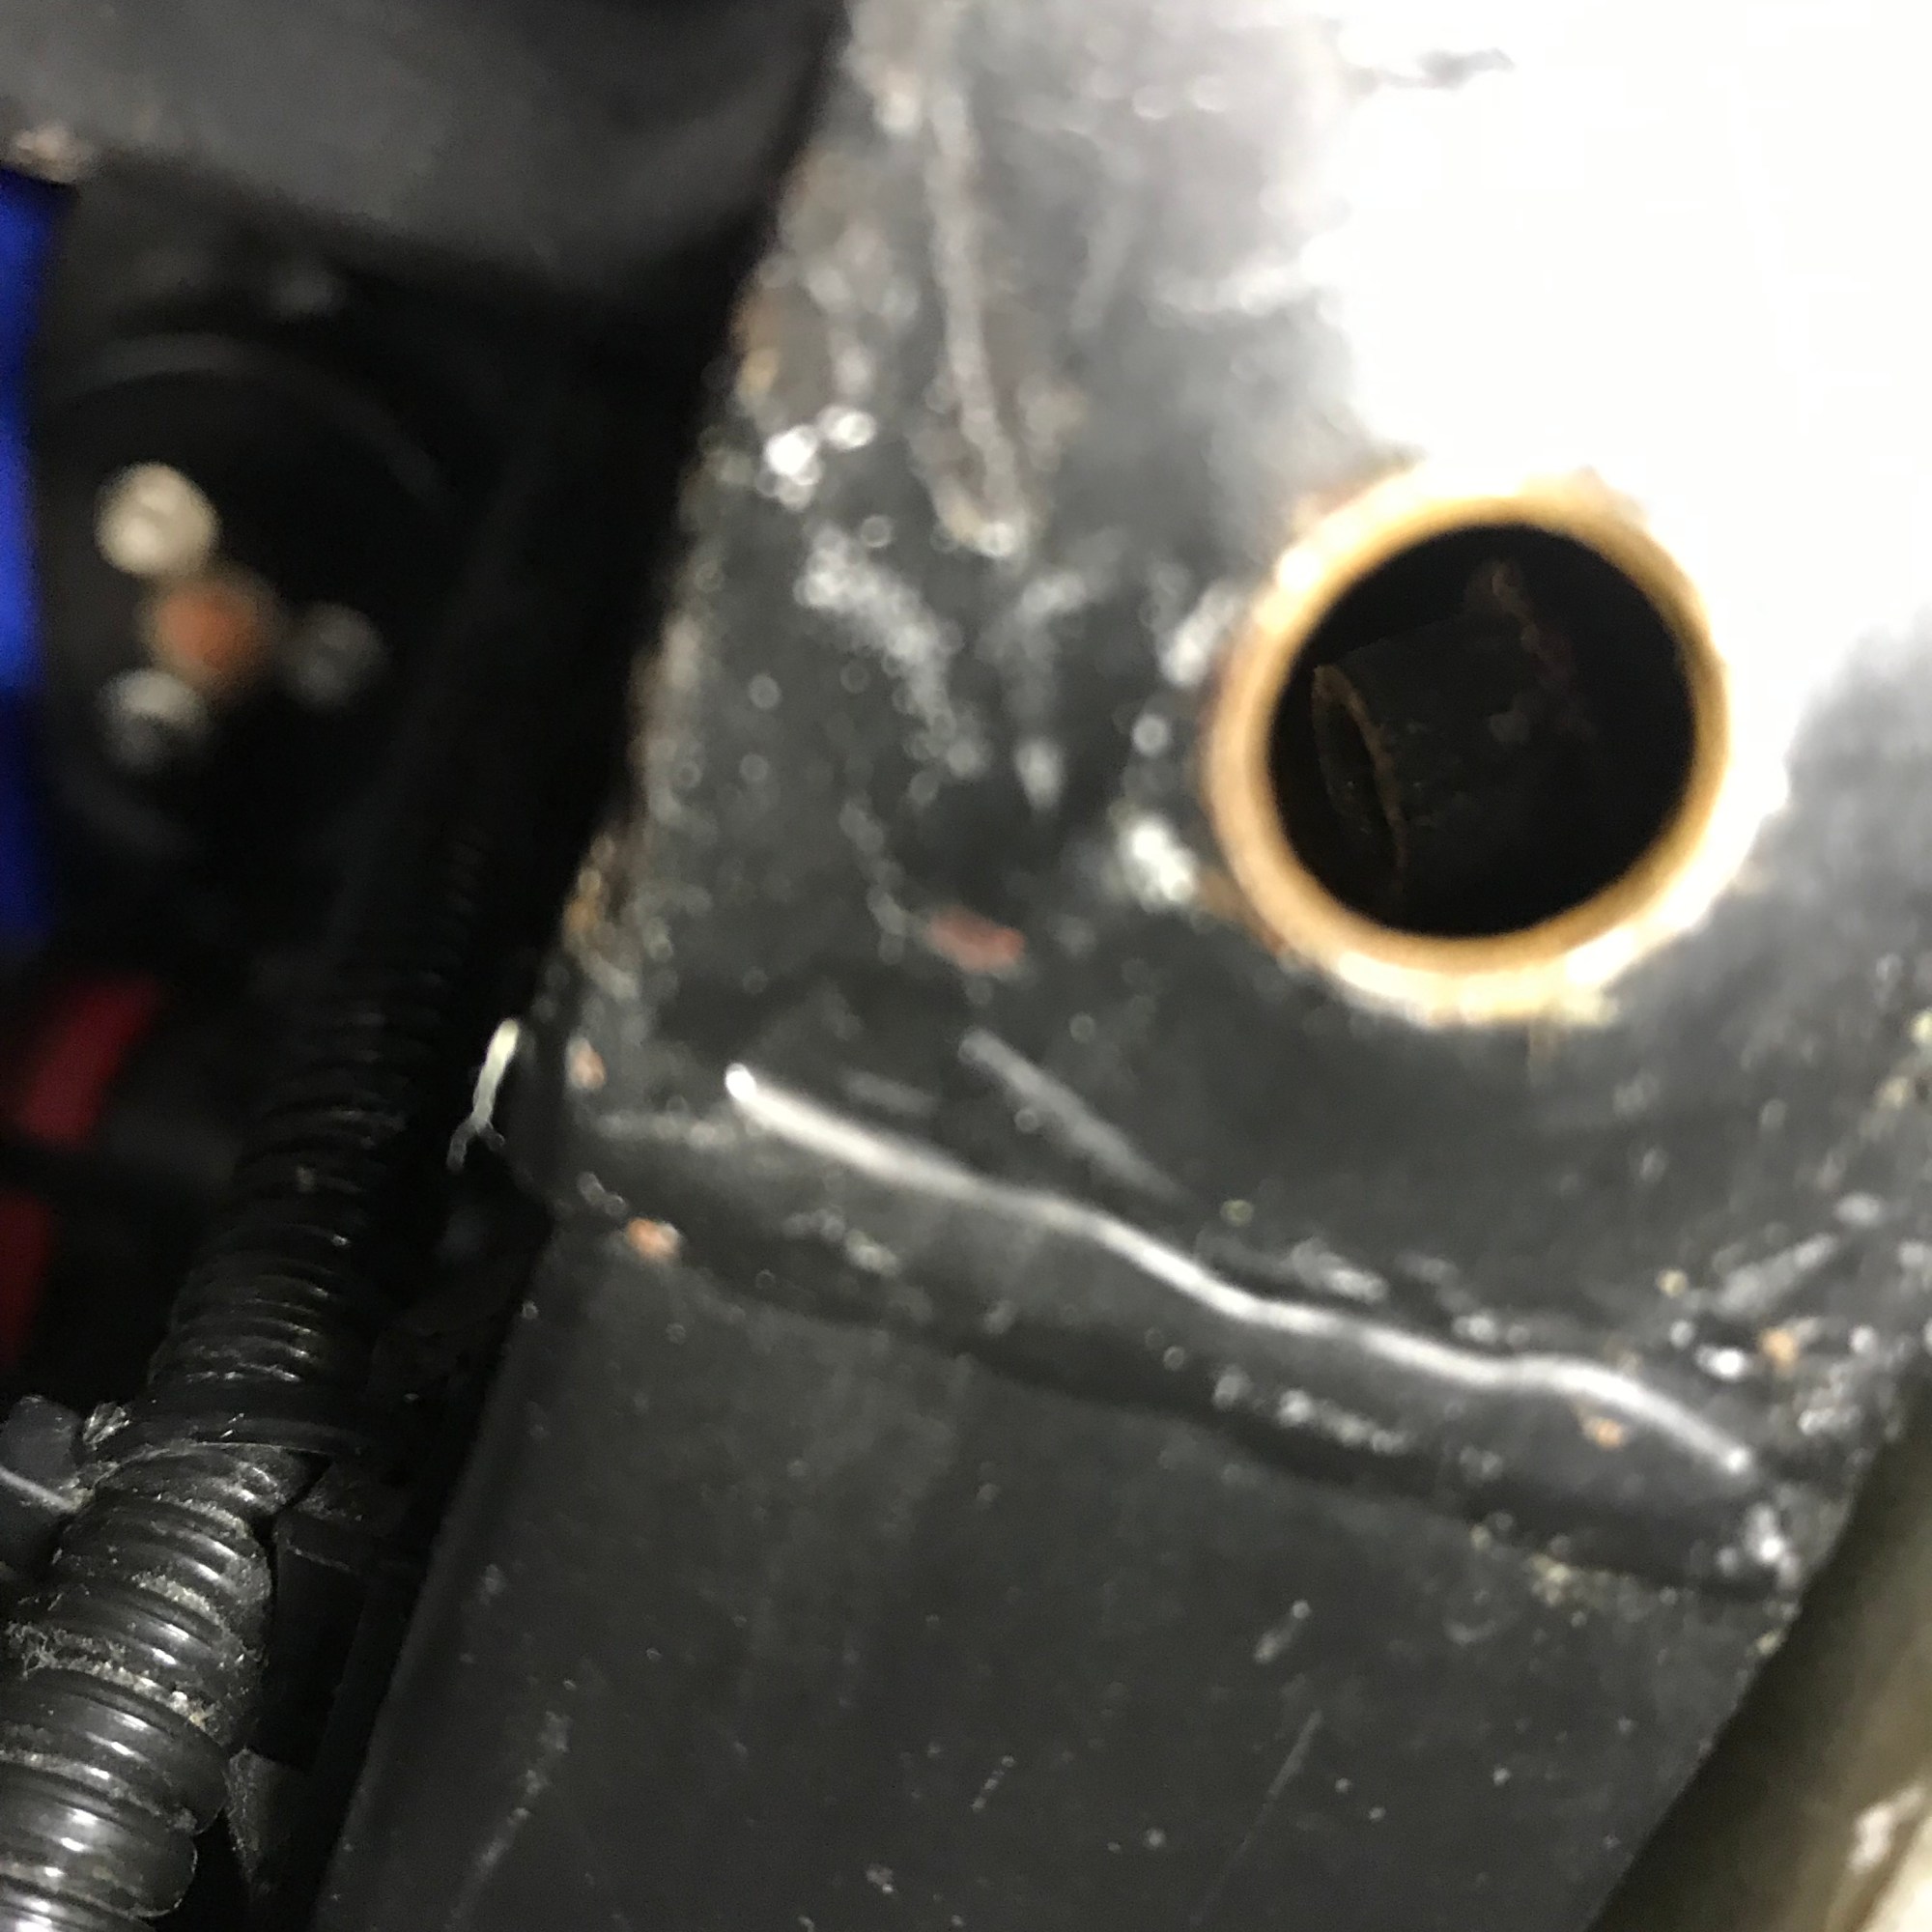
It was a little time consuming to fish it back out with a piece of wire and a delicate job to gentle get the bolt to ‘bite’ and start to screw in. I think I was dangerously close to cross threading. Because of this, I think that I’ll leave the radiator connect directly to the chassis and without a rubber mount. I will find some way to mount some rubber to the bottom of the radiator, against the chassis, so that is braced.
The new radiator fits in perfectly and I’m really pleased with the result:

I got the whole system filled up with coolant and then hit a major snag. The car now won’t start! It’s turning over and trying to fire but only running really roughly for a few seconds before spluttering and stopping. Nothing I’ve done should have stopped the car from starting. I’ve only touched the cooling system.
When I turn it on the fuel pump is continuing to make noise (like it would normally for a few seconds before priming). Even though my display is showing half a tank of fuel I think that I might be empty. Either that, or a blocked fuel filter. Ho hum… a bit disappointing. I’m going to be working late tomorrow so nothing that I can do about it now.
I’ll pop down of Friday with some fresh fuel and if that doesn’t do the trick then I have a new major task to add to the list. If it does do the trick, then I have to add calibrating the fuel gauge instead. I hope that it is just empty!
28/09/2019: I did pop down yesterday with some fuel but I’d run the battery flat trying to start it! Battery out and trickle charge on and she’s back to life again. Having read the manual for the gauge more carefully I now know why it is showing half a tank when it is empty. I’ll post separately about this though.
02/10/2019: And we’re finished! The new radiator is in and reconnected, the fan is attached and I’ve taken her for a quick 25 minute shake down run. Plenty of sitting in traffic too and the temperature only got up to 75oC. Might have the opposite problem now of the engine being too cold! I suspect that the thermostat has been removed or needs replacing. I want to leave the car in one piece in case there is a break in the weather. I’ve not driven her anywhere near as much as I wanted to.
Here’s a few pictures of the car finished up.

I do need to add some kind of rubber stop at the bottom of the radiator to stop it fouling on the chassis. I couldn’t see any marks on the radiator after I’d driven it though so I’m happy to call this job done!

Loving this Blog!
LikeLiked by 1 person